Quantcast
Channel: QPA – Qt Blog
Viewing all 19 articles
Browse latest View live

Retina display support for Mac OS, iOS and X11

$
0
0

Qt 5.0 added basic support for retina reasonable resolution displays. The upcoming Qt 5.1 will improve the support with new API and bug fixes. Qt 4.8 has good support, and backports of some of the Qt 5 patches are available.

While this implementation effort is mostly relevant to Mac and iOS developers, it is interesting to look at how other platforms handle high-dpi displays. There are two main approaches:

  • DPI-based scalingWin32 GDI and KDE. In approach the application works in the full physical device resolution and is provided with a DPI setting or scaling factor, which should be used to scale layouts. Fonts are automatically scaled by the OS (as long as you specify the font sizes in points and not pixels)
  • Pixels By Other Names. In this approach the physical resolution is (to various degrees) hidden to the application. Physical pixels are replaced with logical pixels:
    Platform/API Logical Physical
    HTML CSS pixel Device pixel
    Apple Point Pixel
    Android Density-independent pixel (dp) (Screen) Pixel
    Direct2D Device Independent Pixel (DIP) Physical Pixel
    Qt (past) Pixel Pixel
    Qt (now) Device-Independent Pixel Device Pixel

Qt has historically worked in device pixels with DPI scaling. Back in 2009 support for high DPI values on Windows was improved. The Qt layouts do however not account for increased DPI. Qt 5 now adds support of the “new pixels” type of scaling.

(Are there other high-dpi implementations out there? Use the comments section for corrections etc.)

Mac OS X High-dpi Support

The key to the OS X high-dpi mode is that most geometry that was previously specified in device pixels are now in device-independent points. This includes desktop geometry (which on the 15 inch retina MacBook Pro is 1440×900 and not the full 2880×1800), window geometry and event coordinates. The CoreGraphics paint engine is aware of the full resolution and will produce output at that resolution. For example, a 100×100 window occupies the same area on screen on a normal and high-dpi screen (everything else being equal). On the high-dpi screen the window’s backing store contains 200×200 pixels.

The main benefits of this mode is backwards compatibility and free high-dpi vector graphics. Unaware applications simply continue to work with the same geometry as before and can keep hardcoded pixel values. At the same time they get crisp vector graphics such as text for free. Raster graphics does not get an automatic improvement but is manageable. The downside is the inevitable coordinate system confusion when working with code that mixes points and pixels.

The scale factor between points and pixels is always 2x. This is also true when changing the screen resolution – points and pixels are scaled by the same amount. When scaling for “More Space” applications will render to a large backing store which is then scaled down to the physical screen resolution.

Scaling the user interface resolution on Mac OS

If you don’t have access to retina hardware there is also an emulation mode which can be useful when used on an extra monitor. Open Display Properties and select one of the HiDPI modes. (See this question on stack overflow if there are none.)

Enabling high-dpi for OS X Applications

High DPI mode is controlled by the following keys in the Info.Plist file:

<key>NSPrincipalClass</key>
<string>NSApplication</string>
<key>NSHighResolutionCapable</key>
<string>True</string>

Qmake will add these for you. (Strictly speaking it will only add NSPrincipalClass, NSHighResolutionCapable is optional and true by default).

If NSHighResolutionCapable is set to false, or the keys are missing, then the application will be rendered at the “normal” resolution and scaled up. This looks horrible and should be avoided, especially since the high-dpi mode is very backwards compatible and the application gets a lot of high-dpi support for free.

Scaled Qt Creator

High DPI Qt Creator


(Appart from a patch to update the “mode” icons, this an unmodified version of Qt Creator.)

Qt implementation details

Mac OS 10.8 (unofficially 10.7?) added support for high-dpi retina displays. Qt 4 gets this support for free, since it uses the CoreGraphics paint engine.

Qt 5 uses the raster paint engine and Qt implements high-dpi vector graphics by scaling the painter transform. HITheme provides high-dpi Mac style for both Qt 4 and 5. In Qt 5 the fusion style has been tweaked to run well in high-dpi mode.

OpenGL is a device pixel based API and remains so in high-dpi mode. There is a flag on NSView to enable/disable the 2x scaling – Qt sets it in all cases. Shaders run in device pixels.

Qt Quick 1 is built on QGraphicsView which is a QWidget and gets high-dpi support through QPainter.

Qt Quick 2 is built on Scene Graph (and OpenGL) which has been updated with high-dpi support. The Qt Quick Controls (née Desktop Components) has also been updated to render in high-dpi mode, including using distance field text rendering.

The take-away point here is that for app developers this doesn’t matter, you can do most of your work in the comfort of the device-independent pixel space while Qt and/or the OS does the heavy lifting. There is one exception which is raster content – high-dpi raster content needs to be provided and correctly handled by application code.

Widgets and QPainter

QPainter code can mostly be kept as is. As an example lets look at drawing a gradient:

QRect destinationRect = ...
QGradient gradient = ...
painter.fillRect(rect, QBrush(gradient));

On high-dpi displays the gradient will have the same size on screen but will be filled with more (device) pixels.

Drawing a pixmap is similar:

QRect destinationRect = ...
QPixmap pixmap = ...
painter.drawPixmap(destinationRect, pixmap);

To avoid scaling artifacts on high-dpi displays the pixmap must contain enough pixels: 2x the width and height of destinationRect. The application can either provide one directly or use QIcon to manage the different resolutions:

QRect destinationRect = ...
QIcon icon = ...
painter.drawPixmap(destinationRect, icon.pixmap(destinationRect.size()));

QIcon::pixmap() has been modified to return a larger pixmap on high-dpi systems. This is a behavior change and can break existing code, so it’s controlled by the AA_UseHighDpiPixmaps application attribute:

qApp->setAttribute(Qt::AA_UseHighDpiPixmaps);

The attribute is off by default in Qt 5.1 but will most likely be on by default in a future release of Qt.

Edge cases and devicePixelRatio

Qt Widgets has some edge cases. Ideally it would pass QIcons around and the correct pixmap would be select at draw time, but in reality Qt API often produces and consumes pixmaps instead. This can cause errors when the pixmap size is used for calculating layout geometry – the pixmap should not use more space on screen if it’s high-resolution.

To indicate that a 200×200 pixmap should occupy 100×100 device-independent pixels use QPixmap::devicePixelRatio(). Pixmaps returned from QIcon::pixmap() will have a suitable devicePixelRatio set.

QLabel is one “pixmap consumer” example:

QPixmap pixmap2x = ...
pixmap2x.setDevicePixelRatio(2.0);
QLabel *label = ...
label->setPixmap(pixmap2x);

QLabel then divides by devicePixelRatio to get the layout size:

QSize layoutSize = pixmap.size() / pixmap.devicePixelRatio();

Several issues like this has been fixed in Qt, and application code can have similar code that needs to be corrected before enabling AA_UseHighDpixmaps.

The devicePixelRatio() accessor is available on several Qt classes:

Class Note
QWindow::devicePixelRatio() Preferred accessor
QScreen::devicePixelRatio()
QGuiApplication::devicePixelRatio() Fallback if there is no QWindow pointer
QImage::[set]devicePixelRatio()
QPixmap::[set]devicePixelRatio()

Text

Font sizes can be kept as-is, and produce similarly-sized (but crisp) text on high-dpi displays. Font pixel sizes are device-independent pixel sizes. You never get tiny text on high-dpi displays.

QGlWidget

OpenGL operates in device pixel space. For example, the width and height passed to glViewport should be in device pixels. QGLWidget::resizeGL() gives the width and height in device pixels.

However, QGLWidget::width() is really QWidget::width() which returns a value in device-independent pixels. Resolve it by multiplying with widget->windowHandle()->devicePixelRatio() if needed.

Qt Quick 2 and controls

Qt Quick 2 and the Qt Quick Controls work well out-of-the box. As with widgets coordinates are in device-independent pixels. Qt Quick has fewer raster-related edge cases, since the QML Image element specifies the image source as a url which avoids passing around pixmaps.

Qt Quick Controls

One exception is OpenGL shaders that run in device pixel space and see the full resolution. This is usually not a problem, the main thing to be aware of is that mouse coordinates are in device-independent pixels and may need to be converted to device pixels.

shadereffects example in action

Managing high-resolution raster content

As we have seen, raster content won’t look nice when scaled and high-resolution content should be provided. As an app developer you have two options: (ignoring the “do-nothing” option)

  • Replace existing raster content with a high-resolution version
  • Provide separate high-resolution content

The first option is convenient since there is only one version of each resource. However, you may find (or your designer will tell you) that resources like icons look best when created for a specific resolution. To facilitate this, Qt as adopted the “@2x” convention for image filenames:

foo.png
foo@2x.png

High-resolution content can be provided side-by-side with the originals. The “@2x” version will be loaded automatically when needed by the QML Image element and QIcon:

Image { source = “foo.png” }
QIcon icon(“foo.png”)

(remember to set AA_UseHighDpiPixmaps for QIcon)

Experimental cross-platform high-dpi support:

QPA allows us to relatively easily make a cross-platform implementation. The Qt stack can be divided into three layers:

  1. The Application layer (App code and Qt code that uses the QPA classes)
  2. The QPA layer (QWindow, QScreen, QBackingStore)
  3. The platform plugin layer (QPlatform* subclasses)

Simplified, the application layer operates in the device-independent pixel space and does not know about device pixels. The platform plugins operates in device pixel space and does not know about device-independent pixels. The QPA layer sits in between and translates, based on a scale factor set by the QT_HIGHDPI_SCALE_FACTOR environment variable.

In reality the picture is a little bit more complicated, with some leakage between the layers and the special Mac and iOS exception that there is additional scaling on the platform.

Code is on github. Finally, screenshots of Qt Creator on XCB:

DPI scaled Qt Creator

QT_HIGDPI_SCALE_FACTOR=2 Scaled Qt Creator


The post Retina display support for Mac OS, iOS and X11 appeared first on Qt Blog.
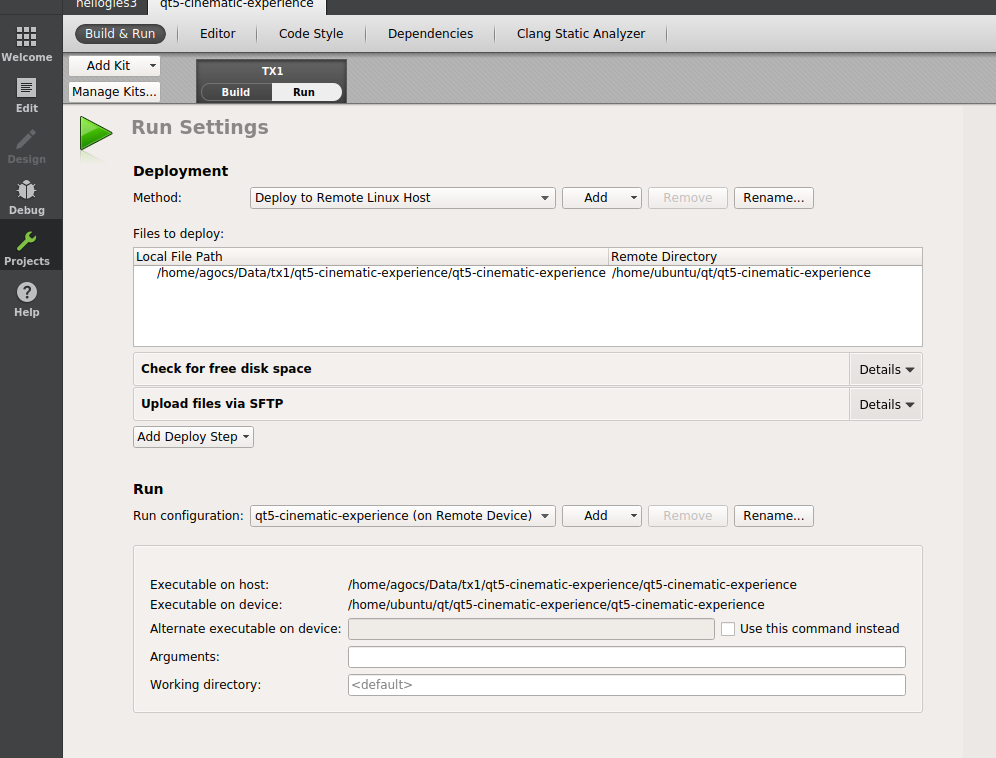

Anatomy of a Qt 5 for Android application

$
0
0

To those of you who were at the Contributor’s Summit, I said that I would write a few more technical blogs about Qt 5 for Android in the near future. This first blog accompanies my session at the CS quite well, as it will give some insight into how the different pieces in the Qt 5 for Android port fit together.

When developing platform ports of Qt, we’re doing our best to hide the piping, so that a developer using Qt can get as far as possible without even considering the target platforms of their application.

However, there are times when it’s useful to understand more about the inner workings of Qt, either if you want to contribute code to Qt itself, when there’s an error and you don’t understand why, or if your application requires a degree of platform integration which we have not yet been able to facilitate. In this blog, I’ll focus on the Qt for Android port in particular.

Prerequisites
It is outside the scope of this blog to explain how the Qt Platform Abstraction API (QPA) works. It is also outside the scope to give a detailed introduction to Android development, and the life span of Android applications. It should hopefully be both understandable and useful without any in-depth knowledge of either technology, however, and if you wish to know more, there is documentation and blogs on both topics to be found on the Internet.

Suffice it to say: Qt abstracts away the windowing system in an API called “QPA”, so that platform-dependent code can be isolated to a plugin. This plugin will handle everything from putting graphics on the screen to propagating events from the windowing system and into your Qt event loop. Android is one such platform, but different in many respects from the other platforms supported by Qt, as it is inherently a Java-based platform. Android applications are Java applications, running on a virtual machine called “Dalvik”. This poses some extra challenges when integrating with the C++ framework Qt.

Which brings us to the “Java Native Interface” (or JNI for short). This is the communication layer between Java and C, and is used by Qt when passing data back and forth between the operating system and the platform plugin. In Qt, we are working on some convenience APIs around the JNI APIs to help you combine Qt code with JNI code if you would like your code to interoperate with Java.

Cross Section
At the very top of levels, a Qt for Android application consists of two parts:

  • The Qt application:
  • This is the cross-platform code and resources that you, as the app developer, manage yourself, and which are summarized by your qmake .pro file.

  • An Android application launcher:
  • This is generated for you by Qt Creator the first time you connect your project to a Qt for Android Kit.

The latter consists of the following:

  • A subclass of android.app.Application:
  • This maintains bindings to Qt using Java’s Reflection API.

  • A subclass of android.app.Activity:
  • This is the application entry point. In Android, an application can consist of several activities, responding to different so-called intents. However, by default a Qt application will only consist of a single activity which can be launched from the Android application grid. Several system events are delivered to the main activity of your application and are then propagated to Qt by this subclass. The QtActivity class also handles loading the native binaries based on the selected deployment method, and launching the application’s main() function.

  • Interfaces for connecting to the Ministro service:
  • Ministro is a deployment mechanism where the Qt libraries are downloaded and maintained by an external service on the target device, and serves to minimize the amount of space used by each Qt application. The interfaces are used to communicate with the service in the case where this deployment mechanism is selected.

  • AndroidManifest.xml:
  • This is the heart of the application meta-data on Android. At some point you will have to edit this to set things such as your application name, package name, version code, icon, permissions, etc. and Qt Creator provides you with a convenient editor for the most common parts of the manifest. In Qt Creator 2.8 and up, you can simply click on the AndroidManifest.xml to open the editor. If you need to customize beyond the options in this editor, click on the XML Source tab in the top right corner.

  • Other meta-data
  • There are a set of extra files used to store additional information about your application. This is e.g. information on the selected deployment mechanism in Qt Creator, an Android layout used for showing a splash screen, translations of Ministro UI text, etc.

When Qt Creator sets up your project for a Qt 5 for Android Kit, it will copy these files from the directory $QT/src/android/java. It will then make modifications to the files based on your deployment settings, your target Android version, etc. When developing a regular Qt application, you don’t have to modify any of this yourself, with the exception of the AndroidManifest.xml, and even that can wait until you actually want to deploy your application to users or market places. At that point you will probably want to set some application specific data, such as the name and icon.

The final piece of the puzzle is the code which resides in Qt. It consists of the following:

  • QtActivityDelegate.java and other Java files:
  • This will set up the UI for your app (just a single SurfaceView which Qt can draw into), and take care of the communication back and forth between the Android OS and QPA. When your application’s activity receives events from the operating system, it will call functions in the QtActivityDelegate and these will propagate into Qt.

  • The platform plugins:
  • Yes, that’s a plural. There are two platform plugins in Qt for Android which cater to two different use cases. The first is a raster-based plugin, which is used for QtWidget-based apps which do not depend on OpenGL. This mimics some of the behavior in a traditional desktop windowing system which allows multiple top-level, non-full-screen windows that can be stacked. The other is GL-based, and used e.g. for Qt Quick 2 applications, which depend on OpenGL ES 2. This has limited support for multiple top-levels (they will all become full screen) so it does not suit the traditional desktop application UI equally well.

Start-up
When it’s started, the Qt for Android application will be just a regular Java application. The entry point will be in QtActivity.java which can be found under android/src/… in your project directory. This code will first check your project meta-data, which is contained in android/AndroidManifest.xml and android/res/values/libs.xml, to see which deployment mechanism has been selected. Qt Creator will update the meta-data based on your project settings. For more insight into the different values here, you can try selecting different deployment mechanisms in Qt Creator and running your application, subsequently browsing the meta-data to see what has changed.

There are three different deployment mechanisms supported, each of which has a slightly different start-up code path:

  1. Bundle Qt libraries in APK:
  2. At start-up, the application will have to copy some of the bundled files into a cache. This is necessary due to some limitations in Qt, and is something which will be improved in Qts to come.

  3. Use Ministro service to install Qt:
  4. If the Ministro service has not yet been installed on the device, your application will ask its user to install it, redirecting them to the market place. Once the service is available, your application will query it for the required Qt libraries and files, downloading anything that’s missing.

  5. Deploy local Qt libraries to temporary directory:
  6. The necessary files have already been deployed to a readable directory structure on the device’s internal storage by Qt Creator before launching the app, and no further preparation is necessary.

Once the preparation is done, the application will first explicitly load Qt (and other) libraries listed in android/res/values/libs.xml in the order given. When that is done, it will load the platform plugin, which serves as both the QPA plugin and the communication layer between Qt and Java. This plugin will first register a set of native callbacks that are called from Java as reactions to Android events and it will register its QPA interfaces. Once this is done, the application will load the final library: The one produced as your application binary. Regular “app” templates in qmake produce shared libraries when built for Android, since the application entry point is actually in Java. This shared library is loaded, and its main() function is then called on a new thread, so that the Android and Qt event loops are running in parallel.

At this point, your application takes over and can run in its thread with no regard to the origin of the input events it is getting.

Just a couple of notes at the end: Bug reports are very welcome, but please file them in the official bug report form, as reports that are entered in the comment field of this blog are very hard to track. In the wiki, there is also a list of devices on which Qt 5 has been tested and confirmed to work. If you are working on a device which is not already in the list, and if you have a moment to spare, we would be very thankful if you could add the device to the list.

Beyond that: If you have questions about Qt for Android, one way to get answers is to find us on IRC. The ones of us in Digia are usually on #necessitas on Freenode during Norwegian business hours. Thanks for reading!

The post Anatomy of a Qt 5 for Android application appeared first on Qt Blog.

Bringing the magic of Qt to Windows Runtime

$
0
0

We’ve been hard at work on the Windows Runtime (WinRT) port and it’s about time we share a bit with all of you. For Qt 5.3, we’re releasing the WinRT port as Beta quality, with most of the Qt Essentials modules in functional form (including QML & Quick). We also have preliminary tooling support, so you can get started on WinRT as quickly as you would on any other supported Qt platform.

An API for modern devices

As a reminder, Windows Runtime is a new API largely tied to Windows Store Apps, or applications which run within the Modern UI environment. It has C++ bindings (among other languages), and can be used on Windows 8, Windows Phone 8, and Windows RT – running the gamut from budget smartphones to high-end PCs. That’s a lot of devices.

One of the most important things for us (and many of you) has been getting Qt Quick working smoothly on the platform. As you might guess, there are some limitations to getting such a stack working here. For one, the memory APIs which are commonly used by just-in-time (JIT) compilers (such as in QtQml’s virtual machine engine) are restricted and cannot be used by apps in the Windows Store (this is, of course, for platform security reasons; the same restriction is in place on iOS). Fortunately, the V4 virtual machine which premiered in Qt 5.2 has solved this problem swimmingly, allowing WinRT to utilize the interpreted codepath for these types of operations (albeit at the cost of some less optimal code execution speed).

Qt Quick up and running

Another issue we’ve faced is that WinRT doesn’t have a native OpenGL stack; it does, however, have Direct3D 11.1. As you might have guessed, the ANGLE project has largely solved the problem for us: Direct3D 11 support was added last year and is now in ANGLE’s mainline. We’ve built on top of this by adding WinRT windowing types to ANGLE’s EGL interface, and also made a few tweaks to support mobile GPU feature levels. The biggest hurdle, though, was finding a way to deliver pre-compiled shader binaries to our OpenGL (and Qt Quick) applications. While the traditional D3D compiler can be used on Windows 8/RT at development time, it isn’t available on Windows Phone (and it isn’t allowed in published apps for any WinRT target). That’s right – much like the restrictions on a JIT, there’s no runtime shader compiler available for Windows Store Apps. While inconvenient at times, offline shader compilation can contribute to a fluid user experience and reduced battery consumption.

SameGame on WinRTQt Quick Same Game running on Windows RT 8.1 (Microsoft Surface RT) and Windows Phone 8 (Nokia Lumia 920)

Our solution has been to introduce qtd3dservice, a background process which uses an inbox/outbox approach to compiling shader source files into shader binaries at runtime. When an app needs a shader compiled, it writes the source to a directory monitored by the compilation service, and the service compiles the source and ships a binary object to the device. These blobs are cached by the service, and can be packaged into the application (e.g. in a Qt resource file) for publication. While this “just-in-time” approach to shader compilation is suboptimal for packaging (the developer must run through their app to make sure all shaders are compiled), it allows for more dynamic shader possibilities at development time. In the future, we do plan to add build-time support for shaders (such as those used internally by the Qt Quick Scene Graph), to relieve developers of this extra packaging step whenever possible.

Pick your tools

With Qt Quick working reasonably well for most apps at this stage, we are improving tooling (as Oliver has already shared, we now have a Creator plugin). The same tools which power the plugin, winrtrunner and windeployqt, can also be used from the command line. Qt Creator support, no doubt, will continue to improve as we move toward the next release of Creator, and a “one IDE” developer experience is definitely in our sights. Even so, serious debugging will still require use of Visual Studio – so, you can either use Visual Studio to complement the capabilities of Qt Creator, or simply use Visual Studio exclusively.

Going forward

Between now and the Qt 5.3.0 release, we’ll keep on strengthening the stability of the port and the developer experience around it. For 5.4, we aim to improve module support, such as implementing backends for Qt Multimedia and Qt Positioning (we already have a Qt Sensors backend, though), as well as improving support for a native look and feel. Check out the Qt 5.3 Beta release, which offers binary installers for the port.

We’re very excited about adding yet another platform to Qt… if you haven’t gotten excited yet, perhaps a short video of the port in action will help sway you in the right direction:

Various Qt demos running on Windows 8.1, Windows RT, and Windows Phone 8

Disclaimer: Parts of the video are sped up to keep the energy level high. For actual performance, please try out the port yourself :)

The post Bringing the magic of Qt to Windows Runtime appeared first on Qt Blog.

Qt Weekly #20: Completing the offering: QOpenGLWindow and QRasterWindow

$
0
0

Together with the introduction of QOpenGLWidget, Qt 5.4 adds two more classes: QOpenGLWindow and QRasterWindow. Let us now look at the list of native window classes and OpenGL container widgets. The list may look long and confusing at first glance, but it is all quite logical so everything will fall into place quickly:

  • QWindow: Represents a native window in the windowing system. The fundamental window class in Qt 5. Every top-level window, be it widget or Quick based, will have a QWindow under the hood. Can also be used directly, without widgets or Quick, both for OpenGL and software rendered graphics. Has no dependencies to the traditional QWidget stack.
  • QRasterWindow: Convenience wrapper over QWindow for software rendered graphics.
  • QOpenGLWindow: Convenience wrapper over QWindow for OpenGL graphics. Optionally backed by a framebuffer object, but the default behavior (and thus performance) is equivalent to QWindow.
  • QOpenGLWidget: The modern replacement for Qt 4’s QGLWidget. A widget for showing OpenGL rendered content. Can be used like any other QWidget. Backed by a framebuffer object.
  • QQuickWindow: A QWindow subclass for displaying a Qt Quick 2 (QML) scene.
  • QQuickView: Convenience wrapper for QQuickWindow for easy setup of scenes loaded from QML files.
  • QQuickWidget: The equivalent of QQuickView in the QWidget world. Like QOpenGLWidget, it allows embedding a Qt Quick 2 scene into a traditional widget-based user interface. Backed by a framebuffer object.

For completeness sake, it is worth noting two additional APIs:

  • QQuickRenderControl: Allows rendering Qt Quick 2 scenes into framebuffer objects, instead of targeting an on-screen QQuickWindow.
  • QWidget::createWindowContainer(): In Qt 5.1 & 5.2 the only way to embed Qt Quick 2 content (or in fact any QWindow) into a widget-based UI was via this function. With the introduction of QQuickWidget and QOpenGLWidget this approach should be avoided as much as possible. Its usage should be restricted to cases where it is absolutely neccessary to have a real native window embedded into the widget-based interface and the framebuffer object-based, more robust alternatives are not acceptable, or where it is known in advance that the user interface layout is such that the embedded window will not cause issues (for example because the embedded window does not care about input, is not part of complex layouts that often get resized, etc.).

We will now take a look at no. 2 & 3, the QWindow convenience wrappers.

Ever since the introduction of the QPA architecture and QWindow, that is, since Qt 5.0, it has been possible to create windows based on QWindow that perform custom OpenGL drawing. Such windows do not use any QWidget-derived widgets, instead they render everything on their own. A game or a graphics intensive application with its own custom user interface is a good example.

This is the most lightweight and efficient way to perform native OpenGL rendering with Qt 5. It is free from the underlying complexities of the traditional widget stack and can operate with nothing but the QtCore and QtGui modules present. On space-constrained embedded devices this can be a big benefit (no need to deploy QtWidgets or any additional modules).

Power and efficiency comes at a cost: A raw QWindow does not hide contexts, surfaces and related settings, and it does not provide any standard mechanism for triggering updates or opening a QPainter (backed by the OpenGL 2.0 paint engine) targeting the window’s associated native window surface.

For example, a simple QWindow subclass that performs continous drawing (synchronized to the display’s vertical refresh by the blocking swapBuffers call) both via QPainter and directly via OpenGL could look like the following:

class MyWindow : public QWindow
{
public:
    MyWindow() : m_paintDevice(0) {
        setSurfaceType(QSurface::OpenGLSurface);

        QSurfaceFormat format;
        format.setDepthBufferSize(24);
        format.setStencilBufferSize(8);
        setFormat(format);

        m_context.setFormat(format);
        m_context.create();
    }

    ~MyWindow() { delete m_paintDevice; }

    void exposeEvent(QExposeEvent *) {
        if (isExposed())
            render();
    }

    void resizeEvent(QResizeEvent *) {
        ...
    }

    void render() {
        m_context.makeCurrent(this);

        if (!m_paintDevice)
            m_paintDevice = new QOpenGLPaintDevice;
        if (m_paintDevice->size() != size())
            m_paintDevice->setSize(size());

        QOpenGLFunctions *f = m_context.functions();
        f->glClear(GL_COLOR_BIT | GL_DEPTH_BUFFER_BIT);
        // issue some native OpenGL commands

        QPainter p(m_paintDevice);
        // draw using QPainter
        p.end();

        m_context.swapBuffers(this);

        // animate continuously: schedule an update
        QCoreApplication::postEvent(new QEvent(QEvent::UpdateRequest), this);
    }

    bool event(QEvent *e) {
        if (e->type() == QEvent::UpdateRequest) {
            render();
            return true;
        }
        return QWindow::event(e);
    }

private:
    QOpenGLContext m_context;
    QOpenGLPaintDevice *m_paintDevice;
};

Now compare the above code with the QOpenGLWindow-based equivalent:

class MyWindow : public QOpenGLWindow
{
public:
    MyWindow() {
        QSurfaceFormat format;
        format.setDepthBufferSize(24);
        format.setStencilBufferSize(8);
        setFormat(format);
    }

    void resizeGL(int w, int h) {
        ...
    }

    void paintGL() {
        QOpenGLFunctions *f = context()->functions();
        f->glClear(GL_COLOR_BIT | GL_DEPTH_BUFFER_BIT);
        // issue some native OpenGL commands

        QPainter p(this);
        // draw using QPainter

        // animate continuously: schedule an update
        update();
    }
};

That is a bit shorter, isn’t it. The API familiar from QOpenGLWidget (initializeGL/resizeGL/paintGL) is there, together with the update() function and the ability to easily open a painter on the window. While QOpenGLWindow, when used this way, does not remove or add anything compared to raw QWindow-based code, it makes it easier to get started, while leading to shorter, cleaner application code.

QRasterWindow follows the same concept. While everything it does can be achieved with QWindow and QBackingStore, like in the raster window example, it is definitely more convenient. With QRasterWindow, the example in question can be reduced to something like the following:

class RasterWindow : public QRasterWindow
{
    void paintEvent(QPaintEvent *) {
        QPainter painter(this);
        painter.fillRect(0, 0, width(), height(), Qt::white);
        painter->drawText(QRectF(0, 0, width(), height()), Qt::AlignCenter, QStringLiteral("QRasterWindow"));
    }
};

Painters opened on a QOpenGLWindow are always backed by the OpenGL paint engine, whereas painters opened on a QRasterWindow are always using the raster paint engine, regardless of having OpenGL support enabled or available at all. This means that QRasterWindow, just like the traditional widgets, is available also in -no-opengl builds or in environments where OpenGL support is missing.

Now, what about incremental rendering? In the QRasterWindow example above there is strictly speaking no need to clear the entire drawing area on each paint. Had the application wished so, it could have continued drawing over the existing, preserved backing store content in each invocation of paintEvent(), as long as the window did not get resized. With QGLWidget, QWindow or the QOpenGLWindow example shown above this is not possible, unless preserved swap is enabled via the underlying windowing system interface, since on each paintGL() call the color buffer contents is effectively undefined. QOpenGLWidget does not have this problem since it is backed by a framebuffer object instead of targeting the window surface directly. The same approach can be applied to QOpenGLWindow too. Hence the introduction of the different update behaviors that can be set on a QOpenGLWindow.

Take the following QWindow-based code:

class MyWindow : public QWindow
{
public:
    MyWindow() : m_paintDevice(0), m_fbo(0), m_iter(0) {
        ... // like in the first snippet above
    }

    ...

    void render() {
        m_context.makeCurrent(this);

        if (!m_fbo || m_fbo->size() != size()) {
            delete m_fbo;
            m_fbo = new QOpenGLFramebufferObject(size(), QOpenGLFramebufferObject::CombinedDepthStencilAttachment);
            m_iter = 0;
        }

        if (!m_paintDevice)
            m_paintDevice = new QOpenGLPaintDevice;
        if (m_paintDevice->size() != size())
            m_paintDevice->setSize(size());

        m_fbo->bind();
        QPainter p(m_paintDevice);

        // Draw incrementally using QPainter.
        if (!m_iter)
            p.fillRect(0, 0, width(), height(), Qt::white);

        p.drawText(QPointF(10, m_iter * 40), QString(QStringLiteral("Hello from repaint no. %1")).arg(m_iter));

        ++m_iter;

        p.end();
        m_fbo->release();

        // Now either blit the framebuffer onto the default one or draw a textured quad.
        ...

        m_context.swapBuffers(this);

        // animate continously: schedule an update
        QCoreApplication::postEvent(new QEvent(QEvent::UpdateRequest), this);
    }

private:
    QOpenGLContext m_context;
    QOpenGLPaintDevice *m_paintDevice;
    QOpenGLFramebufferObject *m_fbo;
    int m_iter;
};

For brevity the code for getting the framebuffer’s content onto the window surface is omitted. With QOpenGLWindow’s PartialUpdateBlit or PartialUpdateBlend the same can be achieved in a much more concise way. Note the parameter passed to the base class constructor.

class MyWindow : public QOpenGLWindow
{
public:
    Window() : QOpenGLWindow(PartialUpdateBlit), m_iter(0) {
        QSurfaceFormat format;
        format.setDepthBufferSize(24);
        format.setStencilBufferSize(8);
        setFormat(format);
    }

    void resizeGL(int, int) {
        m_iter = 0;
    }

    void paintGL() {
        QPainter p(this);

        // Draw incrementally using QPainter.
        if (!m_iter)
            p.fillRect(0, 0, width(), height(), Qt::white);

        p.drawText(QPointF(10, m_iter * 40), QString(QStringLiteral("Hello from repaint no. %1")).arg(m_iter));

        ++m_iter;

        update();
    }

private:
    int m_iter;
};

That’s it, and there is no code omitted in this case. Internally the two are approximately equivalent. With the QOpenGLWindow-based approach managing the framebuffer object is no longer the application’s responsibility, it is taken care by Qt. Simple and easy.

The post Qt Weekly #20: Completing the offering: QOpenGLWindow and QRasterWindow appeared first on Qt Blog.

Qt Weekly #23: Qt 5.5 enhancements for Linux graphics and input stacks

$
0
0

The upcoming Qt 5.5 has received a number of improvements when it comes to running without a windowing system on Linux. While these target mainly Embedded Linux devices, they are also interesting for those wishing to run Qt applications on their desktop machines directly on the Linux console without X11 or Wayland.

We will now take a closer look at the new approach to supporting kernel mode setting and the direct rendering manager, as well as the recently introduced libinput support.

eglfs improvements

In previous versions there used be a kms platform plugin. This is still in place in Qt 5.5 but is not built by default anymore. As features accumulate, getting multiple platform plugins to function identically well gets more complicated. From Qt and the application’s point of view the kms and eglfs platforms are pretty much the same: they are both based on EGL and OpenGL ES 2.0. Supporting KMS/DRM is conceptually no different than providing any other device or vendor-specific eglfs backend (the so-called device hooks providing the glue between EGL and fbdev).

In order to achieve this in a maintainable way, the traditional static, compiled-in hooks approach had to be enhanced a bit. Those familiar with bringing Qt 5 up on embedded boards know this well: in the board-specific makespecs under qtbase/mkspecs/devices one comes across lines like the following:

  EGLFS_PLATFORM_HOOKS_SOURCES = $$PWD/qeglfshooks_imx6.cpp

This compiles the given file in to the eglfs platform plugin. This is good enough when building for a specific board, but is not going to cut it in environments where multiple backends are available and hardcoding any given one is not acceptable. Therefore an alternative, plugin-based approach has been introduced. When looking at the folder qtbase/plugins/egldeviceintegrations after building Qt 5.5, we find the following (assuming the necessary headers and libraries files were present while configuring and building):

  libqeglfs-kms-integration.so
  libqeglfs-x11-integration.so

These, as the names suggest are the eglfs backends for KMS/DRM and X11. The latter is positioned mainly as an internal, development-only solution, although it may also become useful on embedded boards like the Jetson TK1 where the EGL and OpenGL drivers are tied to X11. The former is more interesting for us now: it is the new KMS/DRM backend. And it will be selected and used automatically when no static hooks are specified in the makespecs and the application is not running under X. Alternatively, the plugin to be used can be explicitly specified by setting the QT_QPA_EGLFS_INTEGRATION environment variable to, for instance, eglfs_kms or eglfs_x11. Note that for the time being the board-specific hooks are kept in the old, compiled-in format and therefore there is not much need to worry about the new plugin-based system, unless KMS/DRM is desired. In the future however it is expected to gain more attention since newly introduced board adaptations are recommended to be provided as plugins.

libinput support

libinput is a library to handle input devices, providing device detection, pointer, keyboard and touch events, and additional functionality like pointer acceleration and proper touchpad handling. It is used by Weston, the reference Wayland compositor, and in the future potentially also in X.org.

Using libinput in place of the traditional evdevmouse|keyboard|touch input handlers of Qt 5 has a number of advantages. By using it Qt applications get the same behavior, configuration and calibration that other clients, for example Weston use. It also simplifies bringup scenarios since there will be no need to fight Qt’s input stack separately in case libinput is already proven to work.

On the downside, the number of dependencies are increased. libudev, libevdev, optionally libmtdev are all necessary in addition to libinput. Furthermore keyboard mapping is performed via xkbcommon. This is not a problem for desktop and many embedded distros, but can be an issue on handcrafted systems. Or on an Android baselayer. Therefore libinput support is optional and the evdev* handlers continue to be the default choice.

Let’s see it in action

How can all this be tested on an ordinary Linux PC? Easily, assuming KMS/DRM is usable (e.g. because it is using Mesa with working KMS and DRM support). Below is our application (a standard Qt example from qtbase/examples/opengl/qopenglwidget) running as an ordinary X11 client, using the xcb platform plugin, on a laptop with Intel integrated graphics:

Qt app with widgets and OpenGL on X11

Now, let’s switch to another virtual console and set the following before running the application:

  export QT_QPA_PLATFORM=eglfs
  export QT_QPA_GENERIC_PLUGINS=libinput
  export QT_QPA_EGLFS_DISABLE_INPUT=1

This means we will use the eglfs platform plugin, disabling its built-in keyboard, mouse and touchscreen support (that reads directly from the input devices instead of relying on an external library like libinput), and rely on libinput to get mouse, keyboard and touch events.

If everything goes well, the result is something like this:

Qt app with widgets and OpenGL on KMS/DRM

The application is running just fine, even though there is no windowing system here. Both OpenGL and the traditional QWidgets are functional. As an added bonus, even multiple top-level widgets are functional. This was not supported with the old kms platform plugin, whereas eglfs has basic composition capabilities to make this work. Keyboard and mouse input (in this particular case coming from a touchpad) work fine too.

Troubleshooting guide

This is all nice when it works. When it doesn’t, it’s time for some debugging. Below are some useful tips.

(1)
Before everything else, check if configure picked up all the necessary things. Look at qtbase/config.summary and verify that the following are present:

  libinput................ yes

  OpenGL / OpenVG: 
    EGL .................. yes
    OpenGL ............... yes (OpenGL ES 2.0+)

  pkg-config ............. yes 

  QPA backends: 
    EGLFS ................ yes
    KMS .................. yes

  udev ................... yes

  xkbcommon-evdev......... yes

If this is not the case, trouble can be expected since some features will be disabled due to failing configuration tests. These are most often caused by missing headers and libraries in the sysroot. Many of the new features rely on pkg-config so it is essential to get it properly configured too.

(2)
No output on the screen? No input from the mouse or keyboard? Enable verbose logging. Categorized logging is being taken into use in more and more areas of Qt. This includes also most of the input subsystem and eglfs. Some of the interesting categories are listed below:

  • qt.qpa.input – Enables debug output both from the evdev and libinput input handlers. Very useful to check if a given input device was correctly recognized and opened.
  • qt.qpa.eglfs.kms – Enables logging from the KMS/DRM backend of eglfs.
  • qt.qpa.egldeviceintegration – Enables plugin-related logging in eglfs.

Additionally, the legacy environment variable QT_QPA_EGLFS_DEBUG can also be set to 1 to get additional information printed, for example about the EGLConfig that is in use.

(3)
Check file permissions. /dev/fb0 and /dev/input/event* must be accessible by the application. Additionally, make sure no other application has a grab (as in EVIOCGRAB) on the input devices.

(4)
Q: I launched my application on the console without working keyboard input, I cannot exit and CTRL+C does not work!
A: Next time do export QT_QPA_ENABLE_TERMINAL_KEYBOARD=1 before launching the app. This is very handy for development purposes, until the initial issues with input are solved. The downside is that keystrokes go to the terminal, so this setting should be avoided afterwards.

The future and more information

While the final release of Qt 5.5 is still some months away, all the new features mentioned above are there in the dev branch of qtbase, ready to be tested by those who like bleeding edge stuff. The work is not all done, naturally. There is room for improvements, for example when it comes to supporting screens connected or disconnected during the application’s lifetime, or using alternative keyboard layouts. These will come gradually later on.

Finally, it is worth noting that the Embedded Linux documentation page, which has received huge improvements in the few recent major Qt releases, has been (and is still being) updated with information about the new graphics and input capabilities. Do not hesitate to check it out.

The post Qt Weekly #23: Qt 5.5 enhancements for Linux graphics and input stacks appeared first on Qt Blog.

Qt Weekly #28: Qt and CUDA on the Jetson TK1

$
0
0

NVIDIA’s Jetson TK1 is a powerful development board based on the Tegra K1 chip. It comes with a GPU capable of OpenGL 4.4, OpenGL ES 3.1 and CUDA 6.5. From Qt’s perspective this is a somewhat unorthodox embedded device because its customized Linux system is based on Ubuntu 14.04 and runs the regular X11 environment. Therefore the approach that is typical for low and medium-end embedded hardware, running OpenGL-accelerated Qt apps directly on the framebuffer using the eglfs platform plugin, will not be suitable.

In addition, the ability to do hardware-accelerated computing using CUDA is very interesting, especially when it comes to interoperating with OpenGL. Let’s take a look at how CUDA code can be integrated with a Qt-based application.

Jetson TK1

The board

Building Qt

This board is powerful enough to build everything on its own without any cross-compilation. Configuring and building Qt is no different than in any desktop Linux environment. One option that needs special consideration however is -opengl es2 because Qt can be built either in a GLX + OpenGL or EGL + OpenGL ES configuration.

For example, the following configures Qt to use GLX and OpenGL:

configure -release -nomake examples -nomake tests

while adding -opengl es2 requests the usage of EGL and OpenGL ES:

configure -release -opengl es2 -nomake examples -nomake tests

If you are planning to run applications relying on modern, non-ES OpenGL features, or use CUDA, then go for the first. If you however have some existing code from the mobile or embedded world relying on EGL or OpenGL ES then it may be useful to go for #2.

The default platform plugin will be xcb, so running Qt apps without specifying the platform plugin will work just fine. This is the exact same plugin that is used on any ordinary X11-based Linux desktop system.

Vsync gotchas

Once the build is done, you will most likely run some OpenGL-based Qt apps. And then comes the first surprise: applications are not synchronized to the vertical refresh rate of the screen.

When running for instance the example from qtbase/examples/opengl/qopenglwindow, we expect a nice and smooth 60 FPS animation with the rendering thread throttled appropriately. This unfortunately isn’t the case. Unless the application is fullscreen. Therefore many apps will want to replace calls like show() or showMaximized() with showFullScreen(). This way the thread is throttled as expected.

A further surprise may come in QWidget-based applications when opening a popup or a dialog. Unfortunately this also disables synchronization, even though the main window still covers the entire screen. In general we can conclude that the standard embedded recommendation of sticking to a single fullscreen window is very valid for this board too, even when using xcb, although for completely different reasons.

CUDA

After installing CUDA, the first and in fact the only challenge is to tackle the integration of nvcc with our Qt projects.

Unsurprisingly, this has been tackled by others before. Building on this excellent article, the most basic integration in our .pro file could look like this:

... # QT, SOURCES, HEADERS, the usual stuff 

CUDA_SOURCES = cuda_stuff.cu

CUDA_DIR = /usr/local/cuda
CUDA_ARCH = sm_32 # as supported by the Tegra K1

INCLUDEPATH += $$CUDA_DIR/include
LIBS += -L $$CUDA_DIR/lib -lcudart -lcuda
osx: LIBS += -F/Library/Frameworks -framework CUDA

cuda.commands = $$CUDA_DIR/bin/nvcc -c -arch=$$CUDA_ARCH -o ${QMAKE_FILE_OUT} ${QMAKE_FILE_NAME}
cuda.dependency_type = TYPE_C
cuda.depend_command = $$CUDA_DIR/bin/nvcc -M ${QMAKE_FILE_NAME}
cuda.input = CUDA_SOURCES
cuda.output = ${QMAKE_FILE_BASE}_cuda.o
QMAKE_EXTRA_COMPILERS += cuda

In addition to Linux this will also work out of the box on OS X. Adapting it to Windows should be easy. For advanced features like reformatting nvcc’s error messages to be more of Creator’s liking, see the article mentioned above.

A QOpenGLWindow-based application that updates an image via CUDA on every frame could now look something like the following. The approach is the same regardless of the OpenGL enabler in use: QOpenGLWidget or a custom Qt Quick item would operate along the same principles: call cudaGLSetGLDevice when the OpenGL context is available, register the OpenGL resources to CUDA, and then do map – invoke CUDA kernel – unmap – draw on every frame.

Note that in this example we are using a single pixel buffer object. There are other ways to do interop, for example we could have registered the GL texture, got a CUDA array out of it and bound that either to a CUDA texture or surface.

...
// functions from cuda_stuff.cu
extern void CUDA_init();
extern void *CUDA_registerBuffer(GLuint buf);
extern void CUDA_unregisterBuffer(void *res);
extern void *CUDA_map(void *res);
extern void CUDA_unmap(void *res);
extern void CUDA_do_something(void *devPtr, int w, int h);

class Window : public QOpenGLWindow, protected QOpenGLFunctions
{
public:
    ...
    void initializeGL();
    void paintGL();

private:
    QSize m_imgSize;
    GLuint m_buf;
    GLuint m_texture;
    void *m_cudaBufHandle;
};

...

void Window::initializeGL()
{
    initializeOpenGLFunctions();
    
    CUDA_init();

    QImage img("some_image.png");
    m_imgSize = img.size();
    img = img.convertToFormat(QImage::Format_RGB32); // BGRA on little endian
    
    glGenBuffers(1, &m_buf);
    glBindBuffer(GL_PIXEL_UNPACK_BUFFER, m_buf);
    glBufferData(GL_PIXEL_UNPACK_BUFFER, m_imgSize.width() * m_imgSize.height() * 4, img.constBits(), GL_DYNAMIC_COPY);
    glBindBuffer(GL_PIXEL_UNPACK_BUFFER, 0);

    m_cudaBufHandle = CUDA_registerBuffer(m_buf);

    glGenTextures(1, &m_texture);
    glBindTexture(GL_TEXTURE_2D, m_texture);

    glTexImage2D(GL_TEXTURE_2D, 0, GL_RGBA8, m_imgSize.width(), m_imgSize.height(), 0, GL_BGRA, GL_UNSIGNED_BYTE, 0);

    glTexParameteri(GL_TEXTURE_2D, GL_TEXTURE_MIN_FILTER, GL_LINEAR);
    glTexParameteri(GL_TEXTURE_2D, GL_TEXTURE_MAG_FILTER, GL_LINEAR);
}

void Window::paintGL()
{
    glClear(GL_COLOR_BUFFER_BIT);

    void *devPtr = CUDA_map(m_cudaBufHandle);
    CUDA_do_something(devPtr, m_imgSize.width(), m_imgSize.height());
    CUDA_unmap(m_cudaBufHandle);

    glBindBuffer(GL_PIXEL_UNPACK_BUFFER, m_buf);
    glBindTexture(GL_TEXTURE_2D, m_texture);
    // Fast path due to BGRA
    glTexSubImage2D(GL_TEXTURE_2D, 0, 0, 0, m_imgSize.width(), m_imgSize.height(), GL_BGRA, GL_UNSIGNED_BYTE, 0);
    glBindBuffer(GL_PIXEL_UNPACK_BUFFER, 0);

    ... // do something with the texture

    update(); // request the next frame
}
...

The corresponding cuda_stuff.cu:

#include <stdio.h>
#ifdef Q_OS_MAC
#include <OpenGL/gl.h>
#else
#include <GL/gl.h>
#endif
#include <cuda.h>
#include <cuda_gl_interop.h>

void CUDA_init()
{
    cudaDeviceProp prop;
    int dev;
    memset(&prop, 0, sizeof(cudaDeviceProp));
    prop.major = 3;
    prop.minor = 2;
    if (cudaChooseDevice(&dev, &prop) != cudaSuccess)
        puts("failed to choose device");
    if (cudaGLSetGLDevice(dev) != cudaSuccess)
        puts("failed to set gl device");
}

void *CUDA_registerBuffer(GLuint buf)
{
    cudaGraphicsResource *res = 0;
    if (cudaGraphicsGLRegisterBuffer(&res, buf, cudaGraphicsRegisterFlagsNone) != cudaSuccess)
        printf("Failed to register buffer %u\n", buf);
    return res;
}

void CUDA_unregisterBuffer(void *res)
{
    if (cudaGraphicsUnregisterResource((cudaGraphicsResource *) res) != cudaSuccess)
        puts("Failed to unregister resource for buffer");
}

void *CUDA_map(void *res)
{
    if (cudaGraphicsMapResources(1, (cudaGraphicsResource **) &res) != cudaSuccess) {
        puts("Failed to map resource");
        return 0;
    }
    void *devPtr = 0;
    size_t size;
    if (cudaGraphicsResourceGetMappedPointer(&devPtr, &size, (cudaGraphicsResource *) res) != cudaSuccess) {
        puts("Failed to get device pointer");
        return 0;
    }
    return devPtr;
}

void CUDA_unmap(void *res)
{
    if (cudaGraphicsUnmapResources(1,(cudaGraphicsResource **) &res) != cudaSuccess)
        puts("Failed to unmap resource");
}

__global__ void run(uchar4 *ptr)
{
    int x = threadIdx.x + blockIdx.x * blockDim.x;
    int y = threadIdx.y + blockIdx.y * blockDim.y;
    int offset = x + y * blockDim.x * gridDim.x;

    ...
}

void CUDA_do_something(void *devPtr, int w, int h)
{
    const int blockSize = 16; // 256 threads per block
    run<<<dim3(w / blockSize, h / blockSize), dim3(blockSize, blockSize)>>>((uchar4 *) devPtr);
}

This is all that’s needed to integrate the power of Qt, OpenGL and CUDA. Happy hacking!

The post Qt Weekly #28: Qt and CUDA on the Jetson TK1 appeared first on Qt Blog.

Embedded Linux news in Qt 5.6

$
0
0

With Qt 5.6 approaching, it is time to look at some of the new exciting features for systems running an Embedded Linux variant, just like we did for Qt 5.5 a while ago.

Support for NVIDIA Jetson Pro boards

Boards like the Jetson TK1 Pro running a Yocto-generated Vibrante Linux image have support for X11, Wayland, and even running with plain EGL without a full windowing system. The latter is accomplished by doing modesetting via the well-known DRM/KMS path and combining it with the EGL device extensions. This is different than what the eglfs platform plugin’s existing KMS backend, relying on GBM, offers. Therefore Qt 5.5 is not functional in this environment. For more information on the details, check out this presentation.

Wayland presents a similar challenge: while Weston works fine due to having been patched by NVIDIA, Qt-based compositors built with the Qt Compositor framework cannot function out of the box since the compositor has to use the EGLStream APIs instead of Mesa’s traditional EGLImage-based path.

With Qt 5.6 this is all going to change. With the introduction of a new eglfs backed based on EGLDevice + EGLOutput + EGLStream, Qt applications will just work, similarly to other embedded boards:

eglfs on the Jetson K1 Pro

The well-known Qt Cinematic Experience demo running with Qt 5.6 and eglfs on a Jetson K1 Pro

Cross-compilation is facilitated by the new device makespec linux-jetson-tk1-pro-g++.

Wayland is going to be fully functional too, thanks to the patches that add support for EGL_KHR_stream, EGL_KHR_stream_cross_process_fd, and EGL_KHR_stream_consumer_gltexture in the existing wayland-egl backend of Qt Compositor.

Wayland on the Jetson with Qt

The qwindow-compositor example running on the Jetson with some Qt clients

All this is not the end of the story. There is room for future improvements, for example when it comes to supporting multiple outputs and direct rendering (i.e. skipping GL-based compositing and connecting the stream directly to an output layer à la eglfs to improve performance). These will be covered in future Qt releases.

Note that Wayland support on the Jetson should be treated as a technical preview for the time being. Compositors using the unofficial C++ APIs, like the qwindow-compositor example shown above, will work fine. However, QML and Qt Quick support is still work in progress at the time of writing.

Support for Intel NUC

Some of the Intel NUC devices make an excellent embedded platform too, thanks to the meta-intel and the included meta-nuc layers for Yocto. While these are ordinary x86-64 targets, they can be treated and used like ARM-based boards. When configuring Qt for cross-compilation, use the new linux-nuc-g++ device spec. Graphics-wise everything is expected to work like on an Intel GPU-based desktop system running Mesa. This includes both eglfs (using the DRM/KMS/GBM backend introduced in Qt 5.5) and Wayland.

Wayland on boards based on the i.MX6

Systems based on Freescale’s i.MX6 processors include a Vivante GC2000 GPU and driver support for Wayland. Qt applications have traditionally been working fine on the Weston reference compositor, see for example this previous post for Qt 5.4, but getting Qt-based compositors up and running is somewhat tricky due to some driver specifics that do not play well with QPA and eglfs. With Qt 5.6 this issue is eliminated as well: in addition to the regular Vivante-specific backend (eglfs_viv), eglfs now has an additional backend (eglfs_viv_wl) which transparently ensures proper functionality when running compositor applications built with the Qt Compositor framework. This backend will need to be requested explicitly, so for example to run the qwindow-compositor example, do QT_QPA_EGLFS_INTEGRATION=eglfs_viv_wl ./qwindow-compositor -platform eglfs (the -platform can likely be omitted since eglfs is typically the default).

OpenGL ES 3.0 and 3.1

As presented earlier, OpenGL ES 3 support is greatly enhanced in Qt 5.6. Using the new QOpenGLExtraFunctions class applications targeting embedded devices with GLES 3 capable drivers can now take the full API into use in a cross-platform manner.

libinput

Qt 5.5 introduced support for libinput when it comes to getting input events from keyboards, mice, touchpads, and touchscreens. Qt 5.6 takes this one step further: when libinput is available at build time, it will be set as the default choice in eglfs and linuxfb, replacing Qt’s own evdevkeyboard, mouse, and touch backends.

In some rare cases this will not be desirable (for example when using evdevkeyboard-specific keyboard layouts from the Qt 4 QWS times), and therefore the QT_QPA_EGLFS_NO_LIBINPUT environment variable is provided as a means to disable this and force the pre-5.6 behavior.

That’s it for now. Hope you will find the new Embedded Linux features useful. Happy hacking!

P.S. the Qt World Summit 2015 had a number of exciting talks regarding embedded development, for example Qt for Device Creation, Choosing the right Embedded Linux platform for your next project and many more. Browse the full session list here.

The post Embedded Linux news in Qt 5.6 appeared first on Qt Blog.

Graphics improvements for Embedded Linux in Qt 5.7

$
0
0

As is the tradition around Qt releases, it is now time to take a look at what is new on the Embedded Linux graphics front in Qt 5.7.

NVIDIA DRIVE CX

The linux-drive-cx-g++ device spec introduces support for the NVIDIA DRIVE CX platform. This is especially interesting for the automotive world and is one of the foundations of Qt’s automotive offering. Also, DRIVE CX is in fact the first fully supported embedded system with a 64-bit ARM architecture (AArch64). When it comes to graphics, the core enablers for the eglfs and wayland platform plugins were mostly in place for Qt 5.6 since the stack is very similar to what we had on the previous generation Jetson Pro systems. There are nonetheless a number of notable improvements in Qt 5.7:

  • The JIT is now enabled in the QML JavaScript engine for 64-bit ARM platforms. In previous releases this was disabled due to not having had received sufficient testing. Note that the JIT continues to stay disabled on mobile platforms like iOS due to app store requirements.
  • eglfs, the platform plugin to run OpenGL applications without a windowing system, has improved its backend that provides support for setting up EGL and OpenGL via DRM and the EGLDevice/EGLOutput/EGLStream extensions. The code for handling outputs is now unified with the GBM-based DRM backend (that is typically used on platforms using Mesa), which means that multiple screens are now supported on the NVIDIA systems as well. See the documentation for embedded for more information.
  • When it comes to creating systems with multiple GUI processes and a dedicated compositor application based on Wayland, QtWayland improves a lot. In Qt 5.6 the NVIDIA-specific support was limited to C++-based compositors and the old, unofficial compositor API. This limitation is removed in 5.7, introducing the possibility of creating compositor applications with QML and Qt Quick using the modern, more powerful compositor API which is provided as a technology preview in Qt 5.7.

    One notable limitation for Qt Quick-based compositors (with no serious consequences in practice) on the DRIVE CX is the requirement for using a single-threaded render loop. The default threaded one is fine for applications, but the compositor process requires to be launched with the environment variable QSG_RENDER_LOOP=basic (or windows) for the time being. This may be lifted in future releases.
  • If Qt-based compositors are not desired, Qt applications continue to function well as clients to other compositors, namely the patched Weston version that comes with NVIDIA’s software stack.

NXP i.MX7

Qt is not just for the high-end, though. Qt 5.7 introduces a linux-imx7-g++ device spec as well, which, as the name suggests, targets systems built on the NXP i.MX7. This features no GPU at the moment, which would have been a deal breaker for Qt Quick in the past. This is not the case anymore.

With the Qt Quick 2D Renderer such systems can too use most of the features and tools Qt Quick offers for application development. See our earlier post for an overview. Previously commercial-only, Qt 5.7 makes the 2D Renderer available to everyone under a dual GPLv3/commercial license. What is more, development is underway to further improve performance and integrate it more closely with Qt Quick in future releases.

That’s it for now, enjoy Qt 5.7!

The post Graphics improvements for Embedded Linux in Qt 5.7 appeared first on Qt Blog.


New Compositor API for Qt Wayland

$
0
0

As part of the forthcoming Qt 5.7, we are happy to be releasing a tech preview of the new Qt Wayland Compositor API. In this post, I’ll give you an overview of the functionality along with few examples on how to create your own compositors with it.

Wayland is a light-weight display server protocol, designed to replace the X Window System. It is particularly relevant for embedded and mobile systems. Wayland support in Qt makes it possible to split your UI into different processes, increasing robustness and reliability. The compositor API allows you to create a truly custom UI for the display server. You can precisely control how to display information from the other processes, and also add your own GUI elements.

Qt Wayland has included a compositor API since the beginning, but this API has never been officially released. Now we have rewritten the API, making it more powerful and much easier to use.

Here’s a snapshot of a demo that we showed at Embedded World: it is a compositor containing a launcher and a tiling window manager, written purely in QML.

embedded

We will keep source and binary compatibility for all the 5.7.x patch releases, but since this is a tech preview, we will be adding non-compatible improvements to the API before the final release. The Qt Wayland Compositor API is actively developed in the dev branch of the Qt git repository.

The Qt Wayland Compositor tech preview will be included in the Qt for Device Creation packages. It is not part of the Qt for Application Development binary packages, but when compiling Qt from source, it is built by default, as long as Wayland 1.6 is installed.

What is new?

  • It is now possible to write an entire compositor in pure QML.
  • Improved API: Easier to understand, less code to write – both QML and C++ APIs
  • Completely reworked extension support: Extensions can be added with just a few lines of QML, and there’s a powerful, easy-to-use C++ API for writing your own extensions.
  • Multi-screen support
  • XDG-Shell support: Accept connections from non-Qt clients.
  • And finally, a change that is not visible in the API, but should make our lives easier as developers: We have streamlined the implementation and Qt Wayland now follows the standard Qt PIMPL(Q_DECLARE_PRIVATE) pattern

Take a look at the API documentation for more details.

Examples

Here is a complete, fully functional (but minimalistic) compositor, written purely in QML:

import QtQuick 2.6
import QtQuick.Window 2.2
import QtWayland.Compositor 1.0

WaylandCompositor {
    id: wlcompositor
    // The output defines the screen.
    WaylandOutput {
        compositor: wlcompositor
        window: Window {
            visible: true
            WaylandMouseTracker {
                anchors.fill: parent
                enableWSCursor: true
                Rectangle {
                    id: surfaceArea
                    color: "#1337af"
                    anchors.fill: parent
                }
            }
        }
    }
    // The chrome defines the window look and behavior.
    // Here we use the built-in ShellSurfaceItem.
    Component { 
        id: chromeComponent
        ShellSurfaceItem {
            onSurfaceDestroyed: destroy()
        }
    }
    // Extensions are additions to the core Wayland 
    // protocol. We choose to support two different
    // shells (window management protocols). When the
    // client creates a new window, we instantiate a
    // chromeComponent on the output.
    extensions: [
        WlShell { 
            onShellSurfaceCreated:
                chromeComponent.createObject(surfaceArea, { "shellSurface": shellSurface } );
        },
        XdgShell {
            onXdgSurfaceCreated:
                chromeComponent.createObject(surfaceArea, { "shellSurface": xdgSurface } );
        }
    ]
}

This is a stripped down version of the pure-qml example from the tech preview. And it really is a complete compositor: if you have built the tech preview, you can copy the text above, save it to a file, and run it through qmlscene:
minimalcompositor

These are the commands I used to create the scene above:

./bin/qmlscene foo.qml &
./examples/widgets/widgets/wiggly/wiggly -platform wayland &
weston-terminal &
./examples/opengl/qopenglwindow/qopenglwindow -platform wayland &

The Qt Wayland Compositor API can of course also be used for the desktop. The Grefsen compositor (https://github.com/ec1oud/grefsen) started out as a hackathon project here at the Qt Company, and Shawn has continued developing it afterwards:

grefsen

C++ API

The C++ API is a little bit more verbose. The minimal-cpp example included in the tech preview clocks in at 195 lines, excluding comments and whitespace. That does not get you mouse or keyboard input. The qwindow-compositor example is currently 743 lines, implementing window move/resize, drag and drop, popup support, and mouse cursors.

This complexity gives you the opportunity to define completely new interaction models. We found the time to port everyone’s favourite compositor to the new API:

mazecompositor

This is perhaps not the best introduction to writing a compositor with Qt, but the code is available:
git clone https://github.com/paulolav/mazecompositor.git

What remains to be done?

The main parts of the API are finished, but we expect some adjustments based on feedback from the tech preview.

There are still some known issues, detailed in QTBUG-48646 and on our Trello board.

The main unresolved API question is input handling.

How you can help

Try it out! Read the documentation, run the examples, play around with it, try it in your own projects, and give us feedback on anything that can be improved. You can find us on #qt-lighthouse on Freenode.

The post New Compositor API for Qt Wayland appeared first on Qt Blog.

Qt Graphics with Multiple Displays on Embedded Linux

$
0
0

Creating devices with multiple screens is not new to Qt. Those using Qt for Embedded in the Qt 4 times may remember configuration steps like this. The story got significantly more complicated with Qt 5’s focus on hardware accelerated rendering, so now it is time to take a look at where we are today with the upcoming Qt 5.8.

Windowing System Options on Embedded

The most common ways to run Qt applications on an embedded board with accelerated graphics (typically EGL + OpenGL ES) are the following:

  • eglfs on top of fbdev or a proprietary compositor API or Kernel Modesetting + the Direct Rendering Manager
  • Wayland: Weston or a compositor implemented with the Qt Wayland Compositor framework + one or more Qt client applications
  • X11: Qt applications here run with the same xcb platform plugin that is used in a typical desktop Linux setup

We are now going to take a look at the status of eglfs because this is the most common option, and because some of the other approaches rely on it as well.

Eglfs Backends and Support Levels

eglfs has a number of backends for various devices and stacks. For each of these the level of support for multiple screens falls into one of the three following categories:

  • [1] Output management is available.
  • [2] Qt applications can choose at launch time which single screen to output to, but apart from this static setting no other configuration option is provided.
  • [3] No output-related configuration is provided.

Note that some of these, in particular [2], may require additional kernel configuration via a video argument or similar. This is out of Qt’s domain.

Now let’s look at the available backends and the level of multi-display support for each:

  • KMS/DRM with GBM buffers (Mesa (e.g. Intel) or modern PowerVR and some other systems) [1]
  • KMS/DRM with EGLDevice/EGLOutput/EGLStream (NVIDIA) [1]
  • Vivante fbdev (NXP i.MX6) [2]
  • Broadcom Dispmanx (Raspberry Pi) [2]
  • Mali fbdev (ODROID and others) [3]
  • (X11 fullscreen window – targeted mainly for testing and development) [3]

Unsurprisingly, it is the backends using the DRM framework that come out best. This is as expected, since there we have a proper connector, encoder and CRTC enumeration API, whereas others have to resort to vendor-specific solutions that are often a lot more limited.

We will now focus on the two DRM-based backends.

Short History of KMS/DRM in Qt

Qt 5.0 – 5.4

Qt 5 featured a kms platform plugin right from the beginning. This was fairly usable, but limited in features and was seen more as a proof of concept. Therefore, with the improvements in eglfs, it became clear that a more unified approach was necessary. Hence the introduction of the eglfs_kms backend for eglfs in Qt 5.5.

Qt 5.5

While originally developed for a PowerVR-based embedded system, the new backend proved immensely useful for all Linux systems running with Mesa, the open-source stack, in particular on Intel hardware. It also featured a plane-based mouse cursor, with basic support for multiple screens added soon afterwards.

Qt 5.6

With the rise of NVIDIA’s somewhat different approach to buffer management – see this presentation for an introduction – an additional backend had to be introduced. This is called eglfs_kms_egldevice and allows running on the automotive-oriented Jetson Pro, DRIVE CX and DRIVE PX systems.

The initial version of the plugin was standalone and independent from the existing DRM code. This led to certain deficiencies, most notably the lack of multi-display support.

Qt 5.7

Fortunately, these problems got addressed pretty soon. Qt 5.7 features proper code sharing between the backends, making most of the multi-display support and its JSON-based configuration system available to the EGLStream-based backend as well.

Meanwhile the GBM-based backend got a number of fixes, in particular related to the hardware mouse cursor and the virtual desktop.

Qt 5.8

The upcoming release features two important improvements: it closes the gaps between the GBM and EGLStream backends and introduces support for advanced configurability. The former covers mainly the handling of the virtual desktop and the default, non-plane-based OpenGL mouse cursor which was unable to “move” between screens in previous releases.

The documentation is already browsable at the doc snapshots page.

Besides the ability to specify the virtual desktop layout, the introduction of the touchDevice property is particularly important when building systems where one or more of the screens is made interactive via a touchscreen. Let’s take a quick look at this.

Touch Input

Let’s say you are creating digital instrument clusters with Qt, with multiple touch-enabled displays involved. Given that the touchscreens report absolute coordinates in their events, how can Qt tell which screen’s virtual geometry the event should be translated to? Well, on its own it cannot.

From Qt 5.8 it will be possible to help out the framework. By setting QT_LOGGING_RULES=qt.qpa.*=true we enable logging which lets us figure out the touchscreen’s device node.  We can then create a little JSON configuration file on the device:

{
    "device": "drm-nvdc",
    "outputs": [
      {
        "name": "HDMI1",
        "touchDevice": "/dev/input/event5",
      }
    ]
}

This will come handy in any case since configuration of screen resolution, virtual desktop layout, etc. all happens in the same file.

Now, when a Qt application is launched with the QT_QPA_EGLFS_KMS_CONFIG environment variable pointing to our file, Qt will know that the display connected to the first HDMI port has a touchscreen as well that shows up at /dev/input/event5. Hence any touch event from that device will get correctly associated with the screen in question.

Qt on the DRIVE CX

Let’s see something in action. In the following example we will use an NVIDIA DRIVE CX board, with two monitors connected via HDMI and DisplayPort. The software stack is the default Vibrante Linux image, with Qt 5.8 deployed on top. Qt applications run with the eglfs platform plugin and its eglfs_kms_egldevice backend.

drivecx_small

Our little test environment looks like this:

disp_both

This already looks impressive, and not just because we found such good use for the Windows 95, MFC, ActiveX and COM books hanging around in the office from previous decades. The two monitors on the sides are showing a Qt Quick application that apparently picks up both screens automatically and can drive both at the same time. Excellent.

The application we are using is available here. It follows the standard multi-display application model for embedded (eglfs): creating a dedicated QQuickWindow (or QQuickView) on each of the available screens. For an example of this, check the code in the github repository, or take a look at the documentation pages that also have example code snippets.

A closer look reveals our desktop configuration:

disp2

The gray MouseArea is used to test mouse and touch input handling. Hooking up a USB touch-enabled display immediately reveals the problems of pre-5.8 Qt versions: touching that area would only deliver events to it when the screen happened to be the first one. In Qt 5.8 this is can now be handled as described above.

disp1

It is important to understand the screen geometry concepts in QScreen. When the screens form a virtual desktop (which is the default for eglfs), the interpretation is the following:

  • geometry() – the screen’s position and size in the virtual desktop
  • availableGeometry() – without a windowing system this is the same as geometry()
  • virtualGeometry() – the geometry of the entire virtual desktop to which the screen belongs
  • availableVirtualGeometry() – same as virtualGeometry()
  • virtualSiblings() – the list of all screens belonging to the same virtual desktop

Configuration

How does the virtual desktop get formed? It may seem fairly random by default. In fact it simply follows the order DRM connectors are reported in. This is often not ideal. Fortunately, it is configurable starting with Qt 5.8. For instance, to ensure that the monitor on the first HDMI port gets a top-left position of (0, 0), we could add something like the following to the configuration file specified in QT_QPA_EGLFS_KMS_CONFIG:

{
  "device": "drm-nvdc",
  "outputs": [
    {
      "name": "HDMI1",
      "virtualIndex": 0
    },
    {
      "name": "DP1",
      "virtualIndex": 1
    }
  ]
}

If we wanted to create a vertical layout instead of horizontal (think an instrument cluster demo with three or more screens stacked under each other), we could have added:

{
  "device": "drm-nvdc",
  "virtualDesktopLayout": "vertical",
  ...
}

More complex layouts, for example a T-shaped setup with 4 screens, are also possible via the virtualPos property:

{
  ...
  "outputs": [
    { "name": "HDMI1", "virtualIndex": 0 },
    { "name": "HDMI2", "virtualIndex": 1 },
    { "name": "DP1", "virtualIndex": 2 },
    { "name": "DP2", "virtualPos": "1920, 1080" }
  ]
}

Here the fourth screen’s virtual position is specified explicitly.

In addition to virtualIndex and virtualPos, the other commonly used properties are mode, physicalWidth and physicalHeight. mode sets the desired mode for the screen and is typically a resolution, e.g. “1920×1080”, but can also be set to “off”, “current”, or “preferred” (which is the default).

For example:

{
  "device": "drm-nvdc",
  "outputs": [
    {
      "name": "HDMI1",
      "mode": "1024x768"
    },
    {
      "name": "DP1",
      "mode": "off"
    }
  ]
}

The physical sizes of the displays become quite important when working with text and components from Qt Quick Controls. This is because these base size calculations on the logical DPI that is in turn based on the physical width and height. In desktop environments queries for these sizes usually work just fine, so no further actions are needed. On embedded however, it has often been necessary to provide the sizes in millimeters via the environment variables QT_QPA_EGLFS_PHYSICAL_WIDTH and QT_QPA_EGLFS_PHYSICAL_HEIGHT. This is not suitable in a multi-display environment, and therefore Qt 5.8 introduces an alternative: the physicalWidth and physicalHeight properties (values are in millimeters) in the JSON configuration file. As witnessed in the second screenshot above, the physical sizes did not get reported correctly in our demo setup. This can be corrected, as it was done for the monitor in the first screenshot, by doing something like:

{
  "device": "drm-nvdc",
  "outputs": [
    {
      "name": "HDMI1",
      "physicalWidth": 531,
      "physicalHeight": 298
    },
    ...
  ]
}

As always, enabling logging can be a tremendous help for troubleshooting. There are a number of logging categories for eglfs, its backends and input, so the easiest is often to enable everything under qt.qpa by doing export QT_LOGGING_RULES=qt.qpa.*=true before starting a Qt application.

What About Wayland?

What about systems using multiple GUI processes and compositing them via a Qt-based Wayland compositor? Given that the compositor application still needs a platform plugin to run with, and that is typically eglfs, everything described above applies to most Wayland-based systems as well.

Once the displays are configured correctly, the compositor can create multiple QQuickWindow instances (QML scenes) targeting each of the connected screens. These can then be assigned to the corresponding WaylandOutput items. Check the multi output example for a simple compositor with multiple outputs.

The rest, meaning how the client applications’ windows are placed, perhaps using the scenes on the different displays as one big virtual scene, moving client “windows” between screens, etc., are all in QtWayland’s domain.

What’s Missing and Future Plans

The QML side of screen management could benefit from some minor improvements: unlike C++, where QScreen, QWindow and QWindow::setScreen() are first class citizens, Qt Quick has currently no simple way to associate a Window with a QScreen, mainly because QScreen instances are only partially exposed to the QML world. While this is not fatal and can be worked around with some C++ code, as usual, the story here will have to be enhanced a bit.

Another missing feature is the ability to connect and disconnect screens at runtime. Currently such hotplugging is not supported by any of the backends. It is worth noting that with embedded systems the urgency is probably a lot lower than with ordinary desktop PCs or laptops, since the need to change screens in such a manner is less common. Nevertheless this is something that is on the roadmap for future releases.

That’s it for now. As we know, more screens are better than one, so why not just let Qt power them all?

The post Qt Graphics with Multiple Displays on Embedded Linux appeared first on Qt Blog.

Qt on the NVIDIA Jetson TX1 – Device Creation Style

$
0
0

NVIDIA’s Jetson line of development platforms is not new to Qt; a while ago we already talked about how to utilize OpenGL and CUDA in Qt applications on the Jetson TK1. Since then, most of Qt’s focus has been on the bigger brothers, namely the automotive-oriented DRIVE CX and PX systems. However, this does not mean that the more affordable and publicly available Jetson TX1 devkits are left behind. In this post we are going to take a look how to get started with the latest Qt versions in a proper embedded device creation manner, using cross-compilation and remote deployment for both Qt itself and applications.

jetson

The photo above shows our TX1 development board (with a DRIVE CX sitting next to it), hooked up to a 13″ touch-capable display. We are going to use the best-supported, Ubuntu 16.04-based sample root filesystem from Linux for Tegra R24.2, albeit in a bit different manner than what is shown here: instead of going for the default approach based on OpenGL + GLX via the xcb platform plugin, we will instead set up Qt for OpenGL ES + EGL via the eglfs. Our applications will still run on X11, but in fullscreen. Instead of building or developing anything on the device itself, we will follow the standard embedded practice of developing and cross-compiling on a Linux-based host PC.

Why this approach?

  • Fast. While building on target is fully feasible with all the power the TX1 packs, it is still no match for compiling on a desktop machine.
  • By building Qt ourselves we can test the latest version, or even unreleased snapshots from git, not tied to the out-of-date version provided by the distro (5.5).
  • This way the graphics and input device configuration is under control: we are after EGL and GLES, with apps running in fullscreen (good for vsync, see below) and launched remotely, not a desktop-ish, X11-oriented build. We can also exercise the usual embedded input stack for touch/mouse/keyboard/tablet devices, either via Qt’s own evdev code, or libinput.
  • While we are working with X11 for now, the custom builds will allow using other windowing system approaches in the future, once they become available (Wayland, or just DRM+EGLDevice/EGLOutput/EGLStream).
  • Unwanted Qt modules can be skipped: in fact in the below instructions only qtbase, qtdeclarative and qtgraphicaleffects get built.
  • Additionally, with the approach of fine-grained configurability provided by the Qt Lite project, even the must-have modules can be tuned to include only the features that are actually in use.

Setting Up the Toolchain

We will use L4T R24.2, which features a proper 64-bit userspace.

After downloading Tegra210_Linux_R24.2.0_aarch64.tbz2 and Tegra_Linux_Sample-Root-Filesystem_R24.2.0_aarch64.tbz2, follow the instructions to extract, prepare and flash the device.

Verify that the device boots and the X11 desktop with Unity is functional. Additionally, it is strongly recommended to set up the serial console, as shown here. If there is no output on the connected display, which happened sometimes with our test display as well, it could well be an issue with the HDMI EDID queries: if running get-edid on the console shows no results, this is likely the case. Try disconnecting and reconnecting the display while the board is running.

Once the device is ready, we need a toolchain. For instance, get gcc-linaro-5.3.1-2016.05-x86_64_aarch64-linux-gnu.tar.xz from Linaro (no need for the runtime or sysroot packages now).

Now, how do we add more development files into our sysroot? The default system provided by the sample root file system in Linux_for_Tegra/rootfs is a good start, but is not sufficient. On the device, it is easy to install headers and libraries using apt-get. With cross-compilation however, we have to sync them back to the host as well.

First, let’s install some basic dependencies on the device:

sudo apt-get install '.*libxcb.*' libxrender-dev libxi-dev libfontconfig1-dev libudev-dev

Then, a simple option is to use rsync: after installing new -dev packages on the target device, we can just switch to rootfs/usr on the host PC and run the following (replacing the IP address as appropriate):

sudo rsync -e ssh -avz ubuntu@10.9.70.50:/usr/include .
sudo rsync -e ssh -avz ubuntu@10.9.70.50:/usr/lib .

Almost there. There is one more issue: some symbolic links in rootfs/usr/lib/aarch64-linux-gnu are absolute, which is fine when deploying the rootfs onto the device, but pretty bad when using the same tree as the sysroot for cross-compilation. Fix this by running a simple script, for instance this one. This will have to be done every time new libraries are pulled from the target.

Graphics Considerations

By default Qt gets configured for GLX and OpenGL (supporting up to version 4.5 contexts). For EGL and OpenGL ES (up to version 3.2) we need some additional steps first:

The headers are missing by default. Normally we would install packages like libegl1-mesa-dev, however it is likely safer to avoid this and not risk pulling in the Mesa graphics stack, potentially overwriting the NVIDIA proprietary binaries. Run something like the following on the device:

apt-get download libgles2-mesa-dev libegl1-mesa-dev
ar x ...
tar xf data.tar.xz (do this for both)
sudo cp -r EGL GLES2 GLES3 KHR /usr/include

then rsync usr/include back into the sysroot on the host.

Library-wise we are mostly good, except one symlink. Do this on the device in /usr/lib/aarch64-linux-gnu:

sudo ln -s /usr/lib/aarch64-linux-gnu/tegra-egl/libGLESv2.so.2 libGLESv2.so

then sync the libraries back as usual.

Qt can now be configured with -opengl es2. (don’t be misled by “es2”, OpenGL ES 3.0, 3.1 and 3.2 will all be available as well; Qt applications will get version 3.2 contexts automatically due to the backwards compatible nature of OpenGL ES)

Configuring and Building Qt

Assuming our working directory for L4T and the toolchain is $HOME/tx1, check out qtbase into $HOME/tx1/qtbase (e.g. run git clone git://code.qt.io/qt/qtbase.git -b dev – using the dev branch, i.e. what will become Qt 5.9, is highly recommended for now because the TX1 device spec is only present there) and run the following:

./configure
-device linux-jetson-tx1-g++
-device-option CROSS_COMPILE=$HOME/tx1/gcc-linaro-5.3.1-2016.05-x86_64_aarch64-linux-gnu/bin/aarch64-linux-gnu-
-sysroot $HOME/tx1/Linux_for_Tegra/rootfs
-nomake examples
-nomake tests
-prefix /usr/local/qt5
-extprefix $HOME/tx1/qt5
-hostprefix $HOME/tx1/qt5-host
-opengl es2

Note the dash at the end of the CROSS_COMPILE device option. It is a prefix (for aarch64-linux-gnu-gcc and others) so the dash is necessary.

This will be a release build. Add -force-debug-info if debug symbols are needed. Switching to full debug builds is also possible by specifying -debug.

Check the output of configure carefully, paying extra attention to the graphics bits. Below is an extract with an ideal setup:

Qt Gui:
  FreeType ............................... yes
    Using system FreeType ................ yes
  HarfBuzz ............................... yes
    Using system HarfBuzz ................ no
  Fontconfig ............................. yes
  Image formats:
    GIF .................................. yes
    ICO .................................. yes
    JPEG ................................. yes
      Using system libjpeg ............... no
    PNG .................................. yes
      Using system libpng ................ yes
  OpenGL:
    EGL .................................. yes
    Desktop OpenGL ....................... no
    OpenGL ES 2.0 ........................ yes
    OpenGL ES 3.0 ........................ yes
    OpenGL ES 3.1 ........................ yes
  Session Management ..................... yes
Features used by QPA backends:
  evdev .................................. yes
  libinput ............................... no
  mtdev .................................. no
  tslib .................................. no
  xkbcommon-evdev ........................ no
QPA backends:
  DirectFB ............................... no
  EGLFS .................................. yes
  EGLFS details:
    EGLFS i.Mx6 .......................... no
    EGLFS i.Mx6 Wayland .................. no
    EGLFS EGLDevice ...................... yes
    EGLFS GBM ............................ no
    EGLFS Mali ........................... no
    EGLFS Rasberry Pi .................... no
    EGL on X11 ........................... yes
  LinuxFB ................................ yes
  Mir client ............................. no
  X11:
    Using system provided XCB libraries .. yes
    EGL on X11 ........................... yes
    Xinput2 .............................. yes
    XCB XKB .............................. yes
    XLib ................................. yes
    Xrender .............................. yes
    XCB render ........................... yes
    XCB GLX .............................. yes
    XCB Xlib ............................. yes
    Using system-provided xkbcommon ...... no
Qt Widgets:
  GTK+ ................................... no
  Styles ................................. Fusion Windows

We will rely on EGLFS and EGL on X11 so make sure these are enabled. Having the other X11-related features enabled will not hurt either, a fully functional xcb platform plugin can come handy later on.

Now build Qt and install into $HOME/tx1/qt5. This is the directory we will sync to the device later under /usr/local/qt5 (which has to match -prefix). The host tools (i.e. the x86-64 builds of qmake, moc, etc.) are installed into $HOME/tx1/qt5-host. These are the tools we are going to use to build applications and other Qt modules.

make -j8
make install

On the device, create /usr/local/qt5:

mkdir /usr/local/qt5
sudo chown ubuntu:ubuntu qt5

Now synchronize:

rsync -e ssh -avz qt5 ubuntu@10.9.70.50:/usr/local

Building Applications and other Qt Modules

To build applications, use the host tools installed to $HOME/tx1/qt5-host. For example, go to qtbase/examples/opengl/qopenglwidget and run $HOME/tx1/qt5-host/bin/qmake, followed by make. The resulting aarch64 binary can now be deployed to the device, via scp for instance: scp qopenglwidget ubuntu@10.9.70.52:/home/ubuntu

The process is same for additional Qt modules. For example, to get Qt Quick up and running, check out qtdeclarative (git clone git://code.qt.io/qt/qtdeclarative.git -b dev) and do qmake && make -j8 && make install. Then rsync $HOME/tx1/qt5 like we did earlier. Repeat the same for qtgraphicaleffects, this will be needed by the Cinematic Experience demo later on.

Running Applications

We are almost ready to launch an application manually on the device, to verify that the Qt build is functional. There is one last roadblock when using an example from the Qt source tree (like qopenglwidget): these binaries will not have rpath set and there is a Qt 5.5.1 installation on the device, right there in /usr/lib/aarch64-linux-gnu. By running ldd on our application (qopenglwidget) it becomes obvious that it would pick that Qt version up by default. There are two options: the easy, temporary solution is to set LD_LIBRARY_PATH to /usr/local/qt5/lib. The other one is to make sure no Qt-dependent processes are running, and then wipe the system Qt. Let’s choose the former, though, since the issue will not be present for any ordinary application as those will have rpath pointing to /usr/local/qt5/lib.

The default platform plugin is eglfs, with the eglfs_x11 backend, which does not do more than opening a fullscreen window. This is good enough for most purposes, and also eliminates one common source of confusion: the lack of vsync for non-fullscreen windows. In the default X11-based system there is apparently no vertical synchronization for OpenGL content, unless the window is fullscreen. This is the same behavior like with the Jetson TK1. Running the qopenglwidget example in a regular window will result in an unthrottled rendering rate of 500-600 FPS. Changing to showFullScreen() triggers the expected behavior, the application gets throttled to 60 FPS. Qt Quick is problematic in particular, because the default and best, threaded render loop will result in bad animation timing if vsync-based throttling is not active. This could be worked around by switching to the less smooth basic render loop, but the good news is that with eglfs the problem will not exist in the first place.

Input is handled via evdev, skipping X11. The device nodes may need additional permissions: sudo chmod a+rwx /dev/input/event* (or set up a udev rule). To debug the input devices on application startup, do export QT_LOGGING_RULES=qt.qpa.input=true. If needed, disable devices (e.g. the mouse, in order to prevent two cursors) from X11 via the xinput tool (xinput list, find the device, find the enabled property with xinput list-props, then change it to 0 via xinput set-prop).

And the end result:

qopenglwidget_tx1
qopenglwidget, a mixed QWidget + QPainter via OpenGL + custom OpenGL application

cinematic_tx1
The Qt 5 Cinematic Experience demo (sources available on GitHub) for Qt Quick, with fully functional touch input

Qt Creator

Building and deploying applications manually from the terminal is nice, but not always the most productive approach. What about Qt Creator?

Let’s open Qt Creator 4.1 and the Build & Run page in Options. At minimum, we have to teach Creator where our cross-compiler and Qt build can be found, and associate these with a kit.

Go to Compilers, hit Add, choose GCC. Change the Name to something more descriptive. The Compiler path is the g++ executable in our Linaro toolchain. Leave ABI unchanged. Hit Apply.

tx1_creator1

Now go to Qt Versions, hit Add. Select qmake from qt5-host/bin. Hit Apply.

tx1_creator2

Go to Kits, hit Add. Change the Name. Change the Device type to Generic Linux Device. Change Sysroot to Linux_for_Tegra/rootfs. Change the Compiler to the new GCC entry we just created. Change Qt version to the Qt Versions entry we just created. Hit Apply.

tx1_creator3

That is the basic setup. If gdb is wanted, it has to be set up under Debuggers and Kits, similarly to the Compiler.

Now go to the Devices page in Options. Hit Add. Choose Generic Linux Device and start the wizard. Enter the IP address and ubuntu/ubuntu as username and password. Hit Next and Finish. The testing should succeed. There is no need to associate this Device with the Kit if there is only one Generic Linux Device, but it may become necessary once there are multiple devices configured.

tx1_creator4

Building and Deploying from Qt Creator

Let’s check out the Cinematic Experience demo sources: git clone https://github.com/alpqr/qt5-cinematic-experience.git. In the Configure Project page, select only the kit just created. The configuration is Release since our Qt build was release only. Hit Configure Project. When creating a new project, the approach is the same: make sure the correct kit is selected.

Build the project. Creator will now correctly pick up the cross-compilation toolchain. The result is an ARM binary on our host PC. Let’s deploy and run it.

Choose Deploy. This will likely fail, watch the output in the Compile Output tab (Alt+4). This is because the installation settings are not yet specified in the .pro file. Check this under Run settings on the Projects page. The list in “Files to deploy” is likely empty. To fix this, edit qt5-cinematic-experience.pro and add the following lines at the end:

target.path = /home/ubuntu/qt/$$TARGET
INSTALLS += target

After this, our deployment settings will look a lot better:
tx1_creator7

Choose Run (or just hit Ctrl+R). Creator now uploads the application binary to the device and launches the application remotely. If necessary, the process can also be killed remotely by hitting the Stop button.

tx1_remote
The host and the target

This means that from now on, when doing further changes or developing new applications, the changes can be tested on the device right away, with just a single click.

What’s Next

That’s all for now. There are other interesting areas, multimedia (accelerated video, camera), CUDA, and Vulkan in particular, which unfortunately do not fit in this single post but may get explored in the future. Another future topic is Yocto support and possibly a reference image in the Qt for Device Creation offering. Let us know what you think.

The post Qt on the NVIDIA Jetson TX1 – Device Creation Style appeared first on Qt Blog.

Building the latest greatest for Android AArch64 (with Vulkan teaser)

$
0
0

Let’s say you got a 64-bit ARM device running Android. For instance, the Tegra X1-based NVIDIA Shield TV. Now, let’s say you are also interested in the latest greatest content from the dev branch, for example to try out some upcoming Vulkan enablers from here and here, and want to see all this running on the big screen with Android TV. How do we get Qt, or at least the basic modules like QtGui, QtQuick, etc. up and running on there?

nv_shield_2017 Our test device.

In this little guide we are going to build qtbase for Android targeting AArch64 and will deploy some examples to the Android TV device. To make it more interesting, we will do this from Windows.

Pre-requisites

The Qt documentation and wiki pages document the process fairly well. One thing to note is that a sufficient MinGW toolchain is easily obtainable by installing the official 32-bit MinGW package from Qt 5.8. Visual Studio is not sufficient as of today.

Once MinGW, Perl, git, Java, Ant, the Android SDK, and the 32-bit Android NDK are installed, open a Qt MinGW command prompt and set some environment variables:

set PATH=c:\android\tools;c:\android\platform-tools;
  c:\android\android-ndk-r13b;c:\android\qtbase\bin;
  C:\Program Files\Java\jdk1.8.0_121\bin;
  c:\android\ant\bin;%PATH%
set ANDROID_API_VERSION=android-24
set ANDROID_SDK_ROOT=c:\android
set ANDROID_BUILD_TOOLS_REVISION=25.0.2

Adapt the paths as necessary. Here we assume that the Android SDK is in c:\android, the NDK in android-ndk-r13b, qtbase/dev is checked out to c:\android\qtbase, etc.

The Shield TV has Android 7.0 and the API level is 24. This is great for trying out Vulkan in particular since the level 24 NDK comes with the Vulkan headers, unlike level 23.

Build qtbase

Now the fun part: configure. Note that architecture.

configure -developer-build -release -platform win32-g++
  -xplatform android-g++ -android-arch arm64-v8a
  -android-ndk c:/android/android-ndk-r13b -android-sdk c:/android
  -android-ndk-host windows -android-ndk-platform android-24
  -android-toolchain-version 4.9 -opensource -confirm-license
  -nomake tests -nomake examples -v

Once this succeeds, check the output to see if the necessary features (Vulkan in this case) are enabled.

Then build with mingw32-make -j8 or similar.

Deploying

To get androiddeployqt, check out the qttools repo, go to src/androiddeployqt and do qmake and mingw32-make. The result is a host (x86) build of the tool in qtbase/bin.

For general information on androiddeployqt usage, check the documentation.

Here we will also rely on Ant. This means that Ant must either be in the PATH, as shown above, or the location must be provided to androiddeployqt via the –ant parameter.

Now, Qt 5.8.0 and earlier have a small issue with AArch64 Android deployments. Therefore, grab the patch from Gerrit and apply on top of your qtbase tree if it is not there already. (it may or may not have made its way to the dev branch via merges yet)

After this one can simply go to a Qt application, for instance qtbase/examples/opengl/qopenglwidget and do:

qmake
mingw32-make install INSTALL_ROOT=bld
androiddeployqt --output bld
adb install -r bld/bin/QtApp-debug.apk

Launching

Now that a Qt application is installed, let’s launch it.

Except that it does not show up in the Android TV launcher.

One easy workaround could be to adb shell and do something like the following:

am start -n org.qtproject.example.qopenglwidget/org.qtproject.qt5.android.bindings.QtActivity

Then again, it would be nice to get something like this:

nv_shield_qopenglwidget_launcher

Therefore, let’s edit bld/AndroidManifest.xml:

<intent-filter>
  <action android:name="android.intent.action.MAIN"/>
  <!--<category android:name="android.intent.category.LAUNCHER"/>-->
  <category android:name="android.intent.category.LEANBACK_LAUNCHER" />
</intent-filter>

and reinstall by running ant debug install. Changing the category name does the trick.

Note that rerunning androiddeployqt overwrites the manifest file. A more reusable alternative would be to make a copy of the template, change it, and use ANDROID_PACKAGE_SOURCE_DIR.

The result

Widget applications, including OpenGL, run fairly well:

nv_shield_qopenglwidget

Or something more exciting:

qqvk_shield_1

No, really. That clear to green is actually done via Vulkan.

qt_vk_android_texture

And finally, the hellovulkantexture example using QVulkanWindow! (yeah, colors are a bit bad on these photos)

adb logcat is your friend, as usual. Let’s get some proof that our textured quad is indeed drawn via Vulkan:

qt.vulkan: Vulkan init (libvulkan.so)         
vulkan  : searching for layers in '/data/app/org.qtproject.example.hellovulkantexture-2/lib/arm64'     
...
qt.vulkan: Supported Vulkan instance layers: QVector()              
qt.vulkan: Supported Vulkan instance extensions: QVector(QVulkanExtension("VK_KHR_surface" 25), QVulkanExtension("VK_KHR_android_surface" 6), QVulkanExtension("VK_EXT_debug_report" 2))    
qt.vulkan: Enabling Vulkan instance layers: ()                                                                                            
qt.vulkan: Enabling Vulkan instance extensions: ("VK_EXT_debug_report", "VK_KHR_surface", "VK_KHR_android_surface")                     
qt.vulkan: QVulkanWindow init                                                                                                        
qt.vulkan: 1 physical devices                                                                                                              
qt.vulkan: Physical device [0]: name 'NVIDIA Tegra X1' version 361.0.0                                                                     
qt.vulkan: Using physical device [0]                                                                                                      
qt.vulkan: queue family 0: flags=0xf count=16                                                                                                               
qt.vulkan: Supported device layers: QVector()                                                                                      
qt.vulkan: Enabling device layers: QVector()                                                                                       
qt.vulkan: Supported device extensions: QVector(QVulkanExtension("VK_KHR_swapchain" 68), QVulkanExtension("VK_KHR_sampler_mirror_clamp_to_edge" 1), QVulkanExtension("VK_NV_dedicated_allocation" 1), QVulkanExtension("VK_NV_glsl_shader" 1))                                                                                
qt.vulkan: Enabling device extensions: QVector(VK_KHR_swapchain)                                                     
qt.vulkan: memtype 0: flags=0x1                                                 
qt.vulkan: memtype 1: flags=0x1                           
qt.vulkan: memtype 2: flags=0x7                             
qt.vulkan: memtype 3: flags=0xb                               
qt.vulkan: Picked memtype 2 for host visible memory             
qt.vulkan: Picked memtype 0 for device local memory     
initResources            
uniform buffer offset alignment is 256        
qt.vulkan: Creating new swap chain of 2 buffers, size 1920x1080       
qt.vulkan: Actual swap chain buffer count: 2                
qt.vulkan: Allocating 8847360 bytes for depth-stencil        
initSwapChainResources              
...

Should you need validation layers, follow the instructions from the Android Vulkan docs and rebuild and redeploy the package after copying the libVkLayer* to the right location.

That’s all for now. Have fun experimenting. The basic Vulkan enablers, including QVulkanWindow are currently scheduled for Qt 5.10, with support for Windows, Linux/X11, and Android. (the list may grow later on)

The post Building the latest greatest for Android AArch64 (with Vulkan teaser) appeared first on Qt Blog.

Qt from git on the Tinkerboard (with Wayland)

$
0
0

The Asus Tinkerboard is a nice little board for Embedded Linux (or Android, for that matter), based on the Rockchip RK3288 SoC including a quad-core ARM Cortex-A17 CPU and a Mali-T760 MP4 (T764) GPU. Besides being quite powerful, it has the advantage of being available locally in many countries, avoiding the need to import the boards from somewhere else. It has its own spin of Debian, TinkerOS, which is what we are going to use here. This is not the only available OS/distro choice, check for example the forums for other options.

We are going to set up the latest qtbase and qtdeclarative from the dev branch, and, to make things more interesting, we are going to ignore X11 and focus on running Qt applications via eglfs with the DRM/KMS backend. This is fairly new for Qt on Mali-based systems: in the past (for example, on the ODROID-XU3) we have been using the fbdev-based EGL implementation. Additionally, Wayland, including Qt-based compositors, is functional as well.

tinkerboard_1

First Things First

qtbase/dev recently received a patch with a simple device spec for the Tinkerboard. Make sure this is part of the checkout of the qtbase tree you are going to build.

As usual, we are going to cross-compile. The steps are pretty similar to the Raspbian guide in the Wiki. I have been using this TinkerOS 1.8 image as the rootfs. To get a suitable ARM (32-bit) cross-compiler for x64, try this Linaro toolchain.

When it comes to the userspace graphics drivers, I have been using the latest “wayland” variant from the Firefly RK3288 section at the Mali driver page. Now, the TinkerOS image does actually come with some version/variant of the binary drivers in it so this step may or may not be necessary. In any case, to upgrade to this latest release, get malit76xr12p004rel0linux1waylandtar.gz and copy the EGL/GLES/GBM/wayland-egl libraries to /usr/lib/arm-linux-gnueabihf. Watch out to have all symlinks adjusted.

As the final preparation step, let’s disable auto-starting X: systemctl set-default multi-user.target.

Sysroot, Configure, Build

From this point on, the steps to create a sysroot on the host machine and to build qtbase against it are almost completely the same as in the earlier Wiki guides for the RPi. Feel free to skip reading this section if it all looks familiar already.

  • Install some development headers and libraries on the target: sudo apt-get build-dep qt4-x11 libqt5gui5 wayland weston.
  • Create a sysroot on the host:
    mkdir -p ~/tinker/sysroot/usr
    rsync -e ssh avz linaro@...:/lib ~/tinker/sysroot
    rsync -e ssh avz linaro@...:/usr/include ~/tinker/sysroot/usr
    rsync -e ssh avz linaro@...:/usr/lib ~/tinker/sysroot/usr
    

    (NB. this is a massive overkill due to copying plenty of unnecessary stuff from /usr/lib, but will do for now)

  • Make all symlinks relative:
    cd ~/tinker
    wget https://raw.githubusercontent.com/riscv/riscv-poky/master/scripts/sysroot-relativelinks.py
    chmod +x sysroot-relativelinks.py
    ./sysroot-relativelinks.py sysroot
    
  • Configure with -device linux-tinkerboard-g++:
    ./configure -release -opengl es2 -nomake examples -nomake tests -opensource -confirm-license -v \
    -device tinkerboard -device-option CROSS_COMPILE=~/tinker/toolchain/bin/arm-linux-gnueabihf- \
    -sysroot ~/tinker/sysroot -prefix /usr/local/qt5 -extprefix ~/tinker/qt5 -hostprefix ~/tinker/qt5-host
    

    Adjust the paths as necessary. Here the destination on the target device will be /usr/local/qt5, the local installation will happen to ~/tinker/qt5 while the host tools (qmake, moc, etc.) go to ~/tinker/qt5-host.

  • Then do make and make install as usual.
  • Then rsync qt5 to /usr/local on the device.

Watch out for the output of configure. The expectation is something like the following, especially when it comes to EGLFS GBM:

EGL .................................... yes
  ...
  OpenGL:
    Desktop OpenGL ....................... no
    OpenGL ES 2.0 ........................ yes
    OpenGL ES 3.0 ........................ yes
  ...
Features used by QPA backends:
  evdev .................................. yes
  libinput ............................... yes
  ...
QPA backends:
  ...
  EGLFS .................................. yes
  EGLFS details:
    ...
    EGLFS GBM ............................ yes
    ...
  LinuxFB ................................ yes
  VNC .................................... yes
  ...

Action

Build and deploy additional Qt modules as necessary. At this point QWindow, QWidget and Qt Quick (QML) applications should all be able to run on the device.

Few notes:

  • Set LD_LIBRARY_PATH, if needed. If the Qt build that comes with the system is still there in /usr/lib/arm-linux-gnueabihf, this is pretty much required.
  • When using a mouse, keyboard or touchscreen, make sure the input devices have sufficient permissions.
  • Enable logging by doing export QT_LOGGING_RULES=qt.qpa.*=true.

As proven by the logs shown on startup, applications will use the eglfs_kms backend which is good since it gives us additional configurability as described in docs. The OpenGL ES implementation seems to provide version 3.2 which is excellent as well.

One thing to note is that the performance may suffer by default due to not running at high enough frequency. So if for instance the qopenglwidget example seems to get stuck at 20 FPS after startup, check this forum thread for examples on how to change this.

Wayland

Yes, QtWayland just works. Here is the minimal-qml compositor example with some clients:

tinkerboard_2

One thing to note is that the default egl_platform.h leads to a build failure in qtwayland. To circumvent this, add a cast to EGLNativeWindowType in the problematic eglCreateWindowSurface call.

That’s all for now, have fun with the Tinkerboard!

The post Qt from git on the Tinkerboard (with Wayland) appeared first on Qt Blog.

Vulkan Support in Qt 5.10 – Part 1

$
0
0

As some of you may have heard, one of the new features in Qt 5.10 is the introduction of a set of basic Vulkan enablers. Now that Qt 5.9 is out, it is time to take a look at what this covers (and does not cover) in practice. In order to keep things fun and easy to read, this is going to be split into a series of shorter posts. It must also be mentioned that while the new features mentioned here are all merged to the dev branch of qtbase, there is no guarantee they will not change until the release of Qt 5.10.

Motivation

Qt 5.8 started the research and implementation for gradual improvements when it comes to supporting graphics APIs other than OpenGL. There the focus was mainly on Qt Quick, and scenegraph backends that either do not involve new platform specifics (software) or are available on a single platform/windowing system only (Direct3D 12).

As shown in the pre-work for our D3D12 experiment, getting started with such APIs is easy: 1. grab the native window handle (for example, in case of Windows, QWindow::winId() is the HWND); 2. add your platform-specific code to render stuff; 3. done!

Now, the same is of course possible with Vulkan, as proven by the various projects on GitHub and elsewhere. So what is the point in touching QtGui, the QPA interfaces, and the platform plugins?

Well, things become more interesting when multiple platforms come into play: the way windowing system integration is done in Vulkan requires writing platform-specific code, likely leading to a bunch of ifdefs or similar in cross-platform applications.

Given that we have a cross-platform framework (Qt), it is fairly natural to expect that it should help with abstracting and hiding these bits.

So instead of this:

QWindow *window;

#if defined(VK_USE_PLATFORM_WIN32_KHR)
    VkWin32SurfaceCreateInfoKHR createInfo;
    createInfo.hwnd = (HWND) window->winId();
    ...
    err = vkCreateWin32SurfaceKHR(...);
#elif defined(VK_USE_PLATFORM_WAYLAND_KHR)
    VkWaylandSurfaceCreateInfoKHR createInfo;
    ...
    err = vkCreateWaylandSurfaceKHR(...);
#elif defined(VK_USE_PLATFORM_ANDROID_KHR)
    VkAndroidSurfaceCreateInfoKHR createInfo;
    ...
    err = vkCreateAndroidSurfaceKHR(...)
#elif defined(VK_USE_PLATFORM_XCB_KHR)
    VkXcbSurfaceCreateInfoKHR createInfo;
    ...
    err = vkCreateXcbSurfaceKHR(...)
#elif ...

why not have something like the following:

QWindow *window;

VkSurfaceKHR surface = QVulkanInstance::surfaceForWindow(window);

The windowing system specifics are now conveniently handled in Qt’s platform plugins. No more ifdefs.

The second important motivation factor is that even the D3D12 experiment has shown that many applications are happier with a higher level convenience window class, like QD3D12Window, following the example of QOpenGLWindow. These are inherently limited in some ways, but avoid the need for doing everything from scratch with QWindow (and juggling with surfaces like in the above example…).

Using QWindow directly remains the most powerful way always, giving full control to the application, but as we will see later, doing a fully featured and stable Vulkan-based QWindow is not exactly trivial (think swapchains, exposeEvent(), resizing, QPlatformSurfaceEvent, etc.). Hence the introduction of QVulkanWindow.

What This Is Not

Before moving on to the new QVulkan* classes in detail, let’s clarify quickly what the Vulkan support in Qt 5.10 really is:

  • Qt 5.10 enables applications to perform cross-platform Vulkan rendering in a QWindow and the convenience subclass QVulkanWindow.
  • Besides abstracting the windowing system specifics, a thin wrapper is provided for Vulkan instances and the instance and device specific functions of the core Vulkan 1.0 API.
  • The Vulkan API is not abstracted or hidden in any way. Qt does what it should, i.e. helping with windowing, platform specifics, and function resolving for the core API, but no more than that.
  • Vulkan-based QWindows can be combined with QWidget-based UIs using QWidget::createWindowContainer(). They are no different from OpenGL-based windows in this respect. This is excellent news for 3D tooling type of applications on the desktop using QWidgets, since there is now a Vulkan-based alternative to QGLWidget/QWindow/QOpenGLWindow.
  • Vulkan support does not currently cover modules like Qt Quick, Qt 3D, Qt Canvas 3D, the OpenGL backend of QPainter, the GL composition-based QOpenGLWidget/QQuickWidget, etc.
  • Vulkan support may be introduced to some of these in the future, however this is not in scope for Qt 5.10.

Platforms

So what platforms are supported?

As of Qt 5.10, the situation is the following:

  • Windows (desktop, not WinRT): when the LunarG SDK is installed, and thus the VULKAN_SDK environment variable is set, Vulkan support will automatically get enabled in the Qt build.
  • Linux (xcb only at the moment; support in the wayland platform plugin to be added later on): enabled whenever the Vulkan headers are found during configure time.
  • Android (tested on API level 23 and 24; note that the Vulkan headers (and related tools) are only present in level 24 and newer NDKs out of the box)

Note that Qt’s Vulkan support does not rely on linking to a Vulkan (or loader) library, and rather relies on resolving everything at runtime. Therefore the only hard requirement is the presence of a relatively recent set of Vulkan headers (like > 1.0.13 or so).

When it comes to the pre-built packages, we currently have some open tasks to investigate and implement support for Vulkan-enabled builds on some platforms at least. Hopefully this gets sorted out in time for Qt 5.10.

That’s it for part 1. Stay tuned for part 2, where we will start digging into the actual QVulkan classes!

The post Vulkan Support in Qt 5.10 – Part 1 appeared first on Qt Blog.

Vulkan Support in Qt 5.10 – Part 2

$
0
0

In the previous instalment we looked at the background for Qt 5.10’s upcoming Vulkan support. Let’s now start digging out into the details.

Obtaining a Vulkan-Enabled Qt Build

When building Qt from sources on Windows, Linux or Android, Vulkan support is enabled automatically whenever a Vulkan header is detected in the build environment. Windows is handled specially in the sense that the environment variable VULKAN_SDK – set by the LunarG Vulkan SDK – is picked up automatically.

Check the output of configure (also available afterwards in config.summary):

Qt Gui:
  ...
  Vulkan ................................. yes
  ...

If it says no, go to qtbase/config.tests/qpa/vulkan, run make, and see why it did not compile.

As mentioned in part 1, neither the QtGui library nor the platform plugins link directly to libvulkan or similar. Same applies to Qt applications by default. This comes very handy here: a Vulkan-enabled Qt build is perfectly fine for deployment also to systems without any Vulkan libraries. No headache with missing DLLs and such. Naturally, once it turns out Vulkan is not available at runtime, QVulkanInstance::create() will fail and will return false always. It must also be noted that the applications themselves can choose to link to a Vulkan (loader) library, if they have a reason to do so: all it takes is adding LIBS+=-lvulkan or similar to the .pro file.

Getting a Vulkan Instance

In Vulkan all per-application state is stored in a VkInstance object, see the the specification for a detailed overview. In Qt, Vulkan instances are represented by QVulkanInstance. This is backed by a QPlatformVulkanInstance following the usual QPA patterns. The platform plugins, at least the ones that are interested in providing Vulkan support, are expected to provide an implementation for it under the hood. As described earlier, this currently covers windows, xcb and android.

Following the familiar pattern from QWindow and the QOpenGL* classes, QVulkanInstance performs no initialization until create() is called. The loading of the Vulkan library (or the loader library which in turn routes to a vendor implementation) happens only at this point. (with a few exceptions, see below)

The resulting VkInstance can be retrieved via vkInstance().

Quite unsurprisingly, QVulkanInstance allows specifying the usual instance configuration options, like the desired API version, and, most importantly, the list of layers and extensions to enable.

While the Qt APIs allow including unsupported layers and extensions too – since it filters them out automatically – it may still be necessary in some cases to examine the names and versions of all supported layers and extensions. This can be done at any time – even before calling create() – via supportedExtensions() and supportedLayers(). These will naturally trigger an early loading of the Vulkan implementation when needed.

It is worth knowing that the surface-related extensions that are required for basic operation, such as VK_KHR_surface or VK_KHR_win32_surface, are automatically added to the list by Qt, and applications do not have to worry about these.

Typical main() Patterns

In the end the main() function for a Qt application with a Vulkan-capable window (or a Vulkan-capable window embedded into a QWidget hierarchy) will typically look like the following:

int main(int argc, char **argv)
{
    QGuiApplication app(argc, argv); // or QApplication when widgets are involved

    const bool enableLogsAndValidation = ...

    QVulkanInstance inst;

    if (enableLogsAndValidation) {
        QLoggingCategory::setFilterRules(QStringLiteral("qt.vulkan=true"));

#ifndef Q_OS_ANDROID
        inst.setLayers(QByteArrayList() << "VK_LAYER_LUNARG_standard_validation");
#else // see Android-specifics at https://developer.android.com/ndk/guides/graphics/validation-layer.html
        inst.setLayers(QByteArrayList()
                       << "VK_LAYER_GOOGLE_threading"
                       << "VK_LAYER_LUNARG_parameter_validation"
                       << "VK_LAYER_LUNARG_object_tracker"
                       << "VK_LAYER_LUNARG_core_validation"
                       << "VK_LAYER_LUNARG_image"
                       << "VK_LAYER_LUNARG_swapchain"
                       << "VK_LAYER_GOOGLE_unique_objects");
#endif
    }

    if (!inst.create())
        qFatal("Failed to create Vulkan instance: %d", inst.errorCode());

    MyVulkanWindow w;
    w.setVulkanInstance(&inst);
    w.resize(1024, 768);
    w.show();

    return app.exec();
}

In most cases there will be a single QVulkanInstance. This can live on the stack, but has to be ready before creating the QWindow or QVulkanWindow-derived window objects since they will need to be associated with a QVulkanInstance. (more on this and other window-related topics in part 3)

The logging category qt.vulkan can be very helpful for troubleshooting. When enabled, both QVulkanInstance and, if used, QVulkanWindow will print a number of interesting things on the debug output, during initialization in particular. The hard-coded setFilerRules() call in the code snippet above is not necessarily the best approach always, but works well for platforms where environment variables (QT_LOGGING_RULES) are problematic. On Windows and Linux it is better to control this via the environment or configuration files.

When it comes to output from Vulkan and, first and foremost, the validation layers, QVulkanInstance offers the convenience of automatically redirecting these messages to qDebug. By default VK_EXT_debug_report gets enabled and redirection is active. If this is not desired, set the corresponding flag before calling create().

For example, the output from the hellovulkancubes example running on an NVIDIA Shield TV with Android 7.0 will look something like the following. If there were validation errors, they would show up too in a similar manner.

qt.vulkan: Supported Vulkan instance layers: QVector()
qt.vulkan: Supported Vulkan instance extensions: QVector(QVulkanExtension("VK_KHR_surface" 25), QVulkanExtension("VK_KHR_android_surface" 6), QVulkanExtension("VK_EXT_debug_report" 2))
qt.vulkan: Enabling Vulkan instance layers: ()
qt.vulkan: Enabling Vulkan instance extensions: ("VK_EXT_debug_report", "VK_KHR_surface", "VK_KHR_android_surface")
qt.vulkan: QVulkanWindow init
qt.vulkan: 1 physical devices
qt.vulkan: Physical device [0]: name 'NVIDIA Tegra X1' version 361.0.0
qt.vulkan: Using physical device [0]
Supported sample counts: QVector(1, 2, 4, 8)
Requesting 4x MSAA
qt.vulkan: queue family 0: flags=0xf count=16 supportsPresent=1
qt.vulkan: Using queue families: graphics = 0 present = 0
qt.vulkan: Supported device extensions: QVector(QVulkanExtension("VK_KHR_swapchain" 68), QVulkanExtension("VK_KHR_sampler_mirror_clamp_to_edge" 1), QVulkanExtension("VK_NV_dedicated_allocation" 1), QVulkanExtension("VK_NV_glsl_shader" 1))
qt.vulkan: Enabling device extensions: QVector(VK_KHR_swapchain)
qt.vulkan: memtype 0: flags=0x1
qt.vulkan: memtype 1: flags=0x1
qt.vulkan: memtype 2: flags=0x7
qt.vulkan: memtype 3: flags=0xb
qt.vulkan: Picked memtype 2 for host visible memory
qt.vulkan: Picked memtype 0 for device local memory
qt.vulkan: Color format: 37 Depth-stencil format: 129
Renderer init
qt.vulkan: Creating new swap chain of 2 buffers, size 1920x1080
qt.vulkan: Actual swap chain buffer count: 2 (supportsReadback=1)
qt.vulkan: Allocating 33423360 bytes for transient image (memtype 0)
qt.vulkan: Allocating 66846720 bytes for transient image (memtype 0)

Working with External Graphics Engines

Our final topic for this part is the question of integrating with existing, external engines.

During the lifetime of the Qt 5.x series, there has been a growing focus on making Qt Quick and the underlying OpenGL enablers more interoperable with foreign engines. This led to productizing QQuickRenderControl, the enhancements to QOpenGLContext for adopting existing native contexts, and similar improvements all over the stack.

In the same spirit QVulkanInstance allows adopting an existing VkInstance. All this takes is calling setVkInstance() before create(). This way every aspect of the VkInstance creation is up to the application or some other framework, and QVulkanInstance will merely wrap the provided VkInstance object instead of constructing a new one from scratch.

That’s all for now, stay tuned for part 3!

The post Vulkan Support in Qt 5.10 – Part 2 appeared first on Qt Blog.


Vulkan Support in Qt 5.10 – Part 3

$
0
0

In the previous posts (part 1, part 2) we covered the introduction and basic Vulkan instance creation bits. It is time to show something on the screen!

QWindow or QVulkanWindow?

If everything goes well, the release of Qt 5.10 will come with at least 5 relevant examples. These are the following (with links to the doc snapshot pages), in increasing order of complexity:

hellovulkancubes_android
The hellovulkancubes example, this time running on an NVIDIA Shield TV with Android 7.0

Checking the sources for these examples reveals one common aspect: they all use QVulkanWindow, the convenience QWindow subclass that manages the swapchain and window-specifics for you. While it will not always be suitable, QVulkanWindow can significantly decrease the time needed to get started with Vulkan rendering in Qt applications.

Now, what if one has to go the advanced way and needs full control over the swapchain and the window? That is perfectly doable as well, but getting started may be less obvious than the well-documented QVulkanWindow-based approach. Let’s take a look.

Using a Plain QWindow + QVulkanInstance

There is currently no simple example for this since things tend to get fairly complicated quite quickly. The Qt sources do provide good references, though: besides the QVulkanWindow sources, there is also a manual test that demonstrates creating a Vulkan-enabled QWindow.

Looking at these revals the main rules for Vulkan-enabled QWindow subclasses:

  • There is a new surface type: VulkanSurface. Any Vulkan-based QWindow must call setSurfaceType(VulkanSurface).
  • Such windows must be associated with a QVulkanInstance. This can be achieved with the previously introduced setVulkanInstance() function.
  • Maintaining the swapchain is left completely to the application. However, a well-behaving implementation is expected to call presentQueued() on the QVulkanInstance right after queuing a present operation (vkQueuePresentKHR).
  • Getting a VkSurfaceKHR must happen through surfaceForWindow().
  • To query if a queue family with in a physical device supports presenting to the window, supportsPresent() can be used, if desired. (like with surfaces, this is very handy since there is no need to deal with vkGetPhysicalDeviceWin32PresentationSupportKHR and friends directly).
  • It is highly likely that any Vulkan-enabled window subclass will need to handle QPlatformSurfaceEvent, QPlatformSurfaceEvent::SurfaceAboutToBeDestroyed in particular. This is because the swapchain must be released before the surface, and with QWindow the surface goes away when the underlying native window is destroyed. This can happen unexpectedly early, depending on how the application is structured, so in order to get a chance to destroy the swapchain at the right time, listening to SurfaceAboutToBeDestroyed can become essential.
  • Understanding exposeEvent() is pretty important as well. While the exact semantics are platform specific, the correct behavior in an exposeEvent() implementation is not: simply check the status via isExposed(), and, if different than before, start or stop the rendering loop. This can, but on most platforms does not have to, include releasing the graphics resources.
  • Similarly, any real graphics initialization has to be tied to the first expose event. Do not kick off such things in the constructor of the QWindow subclass: it may not have a QVulkanInstance associated at that point, and there will definitely not be an underlying native window present at that stage.
  • To implement continous updates to the rendering (which may, depending on your logic, be locked to vsync of course), one of the simplest options is to trigger requestUpdate() on each frame, and then handle QEvent::UpdateRequest in a reimplementation of event(). Note however that on most platforms this is essentially a 5 ms timer, with no actual windowing system backing. Applications are also free to implement whatever update logic they like.

Core API Function Wrappers

What about accessing the Vulkan API? The options are well documented for QVulkanInstance. For most Qt-based applications the expectation is that the core Vulkan 1.0 API will be accessed through the wrapper objects returned from functions() and deviceFunctions(). When it comes to extensions, for instance in order to set up the swapchain when managing it manually, use getInstanceProcAddr().

This is the approach all examples and tests are using as well. This is not mandatory, the option of throwing in a LIBS+=-lvulkan, or using some other wrangler library is always there. Check also the Using C++ Bindings for Vulkan section in the QVulkanInstance docs.

That’s all for now, see you in part 4!

The post Vulkan Support in Qt 5.10 – Part 3 appeared first on Qt Blog.

Qt WebGL Streaming merged

$
0
0

Some time ago I published a couple of blog posts talking about Qt WebGL Streaming plugin. The time has come, and the plugin is finally merged into the Qt repository. In the meantime, I worked on stabilization, performance and reducing the calls sent over the network. It also changed a bit in the way the connections are handled.

New client approach

In the previous implementations, the client was accepting more than one concurrent connections. After the latest changes, the plugin is going to behave like a standard QPA plugin. Now, only one user per process is allowed. If another user tries to connect to the web server, it will see a fancy loading screen until the previous client disconnects.
The previous approach caused some problems with how the desktop applications and GUI frameworks are designed. Everyone can agree that desktop applications are not intended to work with concurrent physical users, even if the window instances were different for all users.

No more boilerplate code

Previously the application had to be modified to support this platform plugin. This code was needed to make the application work with the plugin:

class EventFilter : public QObject
{
public:
    virtual bool eventFilter(QObject *watched, QEvent *event) override
    {
        Q_UNUSED(watched);
        if (event->type() == QEvent::User + 100) {
            createWindow(true);
            return true;
        } else if (event->type() == QEvent::User + 101) {
            window->close();
            window->deleteLater();
            return true;
        }

        return false;
    }
};

And install the event filter into the QGuiApplication.

No more modifications in applications are needed anymore.

How to try

So, if you want to give it a try before Qt 5.10 is released (~November 2017) do the following:

Prerequisites

Since WebGL was modelled using OpenGLES2 as reference, first thing you will need is to have an OpenGLES2 version of Qt built. To do that, you need to pass the parameter -opengl es2 to the configure before building.
Example:

./configure -opensource -confirm-license -opengl es2

Depending on your system it is possible you will need some aditional headers and libraries to be able to use es2.

Testing the plugin

After building everything, you can try to run a Qt Quick example.

To try the photoviewer example we need to build it and run with the -platform webgl parameters:

./photoviewer -platform webgl

If you want to try the Qt Quick Controls 2 Text Editor:

./texteditor -platform webgl

Supported options

Currently, the plugin only supports an option to configure the port used by the embedded HTTP Server. If you want to listen in the default HTTP port you should write -platform webgl:port=80.

The future

The plugin will be part of Qt 5.10 release as a technology preview (TP), as it needs to be improved. Currently, the plugin contains an HTTP Server and a Web Sockets server to handle the browser connections. I’m planning to remove the servers from the plugin and start using a Lightweight QtHttpServer we are working on right now. Once it’s ready, you will be able to create an application server to launch different process inheriting the web socket to communicate with the browsers. This will allow for supporting more than one concurrent user instead of sharing applications among users.

The post Qt WebGL Streaming merged appeared first on Qt Blog.

Qt Quick WebGL release in Qt 5.12

$
0
0

One of the Qt 5.12 new features is Qt Quick WebGL platform plugin (also known as WebGL streaming). It was actually available as a technology preview from Qt 5.10 already, but starting with Qt 5.12 it is a released feature.

TLDR

$ ./your-qt-application -platform webgl:port=8998

Intro

If you missed previous blog-posts, here they are:

There is also a good article by Jeff Tranter from ICS.

This post is intended to be a kind of an “unboxing” experience from the perspective of an average Qt “user” – I never tried Qt Quick WebGL streaming myself, neither did I participate in its development.

What is WebGL streaming

If you read past blog-posts, you can just skip this section. I would however recommend to at least read the documentation (the link will point to 5.12 docs after release).

WebGL streaming is a QPA plugin that sends (“streams”) OpenGL calls of your Qt Quick application over the network and in turn those are translated into WebGL calls and thus can be rendered at HTML5 Canvas. What it means in practice is that you can have an application running on a remote host and render its GUI in a local web-browser.

Here’s how it looks schematically:

Here’s also a video from KDE Akademy with a more detailed explanation by Jesus Fernandez.

But since I’m a simple Qt “user”, I don’t really care about any of that (it’s all hidden from me anyway), and to me everything looks like this:

So I can have a Qt-based application running on some device and work with it from Safari on my iPad. Sounds alright.

Naturally, instead of a device (Raspberry Pi in this case) there could be a desktop computer “hosting” the application, but I think WebGL streaming will be used mostly on embedded platforms (see use cases section).

Let’s now highlight a couple of points we’ve just learnt about the feature:

  • The application itself does not run inside a web-browser. Web-browser only renders its GUI;
  • So it is neither video-streaming, nor mirroring. It is about “decoupling” application’s GUI and showing it in a web-browser;
  • Since it’s for OpenGL (ES) things only, WebGL streaming does not work with Widgets or any other non-OpenGL stuff.

In fact, if you try to launch some “non-compatible” Qt application using WebGL QPA, most likely you’ll get the following error:

qt.qpa.webgl: WebGL QPA platform plugin: Raster surfaces are not supported

How to use it

You only need to install it:

…or, if you are not into installers, build Qt from sources as usual – no special configuration options needed. Actually, with earlier versions -opengl es2 option was required, but there is no need in that as Qt Quick Scene Graph can use ES subset even if there is a later version of OpenGL available.

Having installed Qt itself, build any Qt Quick application of yours and launch it with the following command line arguments:

$ ./your-qt-application -platform webgl

Yes, you don’t need to make any modifications in your source code, it just works. Open the following address in your web-browser: 127.0.0.1:8080, where 127.0.0.1 is the IP address of the host running your application.

If you want to use a different port, you can specify it like that:

$ ./your-qt-application -platform webgl:port=8998

Needless to say, Qt WebGL is cross-platform, and it works equally fine on Linux, Mac OS and Windows. Although, there are some differences in launching applications:

Linux:

./your-qt-application -platform webgl:port=8998

Mac OS:

QT_QPA_PLATFORM=webgl:port=8998 ./your-qt-application.app/Contents/MacOS/your-qt-application

…because Qt version I have at the moment apparently ignores -platform option (which sounds like a bug that needs to be reported).

Windows:

your-qt-application.exe -platform webgl:port=8998

And of course you can do it in a cross-platform (duh) way via qputenv() in your main.cpp:

// ...
qputenv("QT_QPA_PLATFORM", "webgl:port=8998");

QGuiApplication app(argc, argv);
// ...

Speaking about web-browsers support, I tried several ones (except for the one with trident and his younger brother), and it worked in all of them, so it looks like WebGL is well supported in modern browsers nowadays. Although, I did experience a couple of occasional page reloads, and also Chrome on Android tablet even crashed once, so apparently not that well, but that’s really outside the Qt’s scope.

With regards to performance, the most “busy” time is during the initialization phase, when web-browser is receiving buffers, textures, glyphs, atlases and so on. After the first draw call, the bandwidth usage is pretty low. And by the way, since OpenGL ES calls are sent as binary data, it should be more “light-weight” than VNC. I am actually thinking about writing another blog-post to compare WebGL streaming and VNC in terms of network utilization.

Some demos

There is already a fair amount of demo videos in previous blog-posts, and here’s also another nice compilation, so I decided to create a couple of my own.

Device Information

This one is a rather simple demo application. It gathers some information about the platform it is running on. For example, here’s what it shows when I run it on my Mac:


If video doesn’t play in your browser, you can download it here

Let’s now run it on Raspberry Pi using WebGL streaming plugin, connect to it from a web-browser on the same Mac and ascertain that it no longer reports Mac OS as operating system and that platform is webgl now. There is one more thing to see here – pay attention to changing values of the “screen” resolution:

As you can see, when I resize the browser window, application (beside nicely adapting its layout) reports changed screen resolution values. This is because it takes canvas dimensions for the screen resolution. Let’s check that in web-browser inspector:

By the way, we can take a look at user input events here as well:

So application does indeed run on Raspberry, and what I have in my browser is just its “streamed” GUI.

Camera

This demo is a bit more practical one – it’s a camera controlled by robotic-ish arm which is mounted on a Raspberry Pi device:

The idea is to control the camera (its pan and tilt) with a Qt-based application running on the device, but to do that remotely from a web-browser on some tablet. And of course we would like to see what cameras is looking at (its viewfinder). And it also would be nice to make photos with the camera.

Here’s a list of required hardware for such a setup:

And that’s the manual I used to assemble it.

Now let’s take a little detour (spoiler: I will be promoting Qt’s commercial features). You might have noticed that for Device Information demo I used Boot to Qt image, saving myself quite some time and efforts with regards to building Qt-based application for Raspberry Pi and deploying it there.

But Boot to Qt is a commercial-only feature, and without it you’ll have to go though some more steps setting up system environment. Here’s what it takes with a regular Raspbian Stretch Lite image as an example:

  • Since Qt Multimedia module is used, you need to make sure that GStreamer is installed in the system and you have correct plugins available;
  • Get the latest Qt build (5.12) for Raspberry Pi. Either set a cross-compilation toolchain on your desktop or build it right on the device. Building Qt from sources directly on Raspberry Pi is actually a viable option (especially if you failed with cross-compilation toolchain), although compilation itself takes around 10 hours and requires some dances with increasing available swap size (1 GB of RAM is really not enough);
  • Build V4L driver to make camera discoverable by GStreamer and thus Qt;
  • Come up with a convenient way of building/deploying your applications on device.

Even though this list of steps is not too long, in practice it can take you up to several days before you get a working setup, whether with Boot to Qt image you get everything working out-of-the-box, and you can run your applications on the connected device right from the Qt Creator. But enough with the promotional part, let’s get back to demo.

The GUI layout looks like the following:

Most of the space on the first tab is taken by the camera’s viewfinder, which is implemented with VideoOutput and Camera itself:

Camera { id: camera }

VideoOutput {
    anchors.fill: parent
    fillMode: VideoOutput.PreserveAspectCrop
    source: camera
}

There are two sliders, horizontal and vertical – for controlling pan and tilt of the camera:

Slider {
    id: sliderTilt
    orientation: Qt.Vertical
    from: root.maxValue
    value: 0
    stepSize: 1
    to: -root.maxValue

    onPressedChanged: {
        if (!pressed)
        {
            backend.movePanTilt(basePath, sliderPan.value, sliderTilt.value)
        }
    }
}

Pan-Tilt HAT servos are interfaced via I2C, and due to the lack of time I went with fast and dirty solution – by using Pimoroni’s Python library. At some point I would like to do it properly with C/C++, although it’s really not the point of the demo.

There is also a button for taking photos using CameraCapture:

Button {
    scale: hovered ? (pressed ? 0.9 : 1.1) : 1

    background: Rectangle {
        color: "transparent"
    }

    Image {
        anchors.fill: parent
        source: "/img/camera.png"
    }

    onClicked: {
        camera.imageCapture.captureToLocation(basePath + "shots/" + getCurrentDateTime() + ".jpg");
    }
}

Second tab contains a list of taken photos:

…which is implemented by FolderListModel:

ListView {
    FolderListModel {
        folder: "file:" + basePath + "shots/"
        nameFilters: ["*.jpg"]
    }
    
    model: folderModel
    
    delegate: ItemDelegate {
        text: model.fileName
    }
}

Full application source code is available here.

Now let’s see it in action. There are 3 spirits placed on my table, surrounding the camera, and I want to take photos of each. I built and ran the application on device with -platform webgl, and connected to it over Wi-Fi from Safari on my iPad:

As you can see, the plan worked out just fine: seeing camera’s viewfinder, I can remotely control its position and take photos of the objects I’m interested in.

Use cases

Most obvious use case for WebGL streaming is the ability to have a decent GUI for some low-end device with limited computing power, without GPU, and quite often without any display at all. For instance, that is a common scenario for industrial automation domain, where you can have lots of headless devices installed all over the factory: they can be distributed over quite a significant area or even mounted in places with hazardous environment – being able to control/configure those remotely comes to be rather handy.

Reading discussion at Hacker News, I stumbled upon a “reverse” idea: what if it’s the other way around, what if “device” is actually a very powerful server, and you work with it from your regular desktop. That way you can can perform some heavy calculations on the server while having GUI in your web-browser (which actually begs for an HTML-based frontend but more on this in the next section).

Another possible use-case is an anti-piracy measure. Let’s say you want to protect your software from being “cracked” or “pirated”. Obviously, if there is nothing running on the client, then there is nothing to crack as your users only have GUI rendered in their browsers, and the application itself is running on your server. Sounds interesting, but there are several drawbacks here:

  • While WebGL streaming performs well in local network, using it over the internet will result in significant latency;
  • Connection is not encrypted, so it is not secure;
  • Currently only one connection at a time is supported (so only one user).

Overall, supporting only one connection at a time fairly reduces the number of possible use cases, and unfortunately it is unlikely that current implementation of the feature will improve in that regard, so it is more of a task for Qt 6. By the way, there is an idea to complement streaming with an ability of mirroring as in some cases having the latter is more important.

Speaking about mirroring, I would like to mention our recent webinar that we had together with Toradex. There you can see an interesting combination of WebGL streaming and Remote Objects, which allows you to implement mirroring functionality as of now already.

Another noticeable aspect of WebGL streaming is so-called “zero install” concept – you don’t have to install/deploy anything on clients (desktops/tablets/smartphones/etc) as the only thing needed is just a web-browser. However, Qt for WebAssembly seems to be a bit more suitable for that purpose.

WebGL streaming vs actual web

Some of you might ask, what is the point of relying on WebGL streaming in the first place? Since it’s all about web-browser, one can just take a regular web-server and create a web-application – result will be almost the same: backend is hosted on the remote device and HTML-based GUI is rendered in the web-browser.

That is a very good and fair question. I actually have some experience in web-development, so I asked this question myself. Let’s try to answer it, hopefully without starting yet another holy war.

Indeed, in some cases it is enough just to have a simple REST API, especially if you only need to get some plain text data values. So it is likely that Qt-based application with WebGL streaming would be an overkill for such purpose.

However, in more sophisticated scenarios (for example, when you need to control some hardware) Qt-based application with WebGL-streamed GUI might fit better, because that way you’ll get a powerful backend (C++/Qt), and I would also mention that creating a complex, appealing and performant frontend is (considerably) easier with Qt Quick rather than with HTML/CSS/JS, but this statement does look like a beginning of yet another holy war, so I’ll keep that as my personal opinion.

And the last thing worth to mention here – if you already have a Qt-based application, then WebGL streaming is an obvious option, because it will cost you nothing to have a remote GUI for it.

Licensing/pricing

WebGL streaming plugin is available under commercial and Open Source licenses (but GPLv3 only). And for commercial customers it is included in both Application Development and Device Creation products with no additional charge.

Conclusion

So you’re now able to use web-browser as a remote GUI client for your Qt Quick applications with no efforts – it only takes one command line parameter.

In terms of further development, I reckon the next thing to be expected is connection security/encryption, both for WebSocket and WebServer. WebSocket part should be pretty straightforward as QWebSocket already supports secure connection (wss://). And WebServer part, if you remember, from the very beginning was a temporary solution, and research on proper implementation (including support for HTTPS) is still ongoing.

Meanwhile, if you have any other feature-requests or maybe bugs to report, please use our tracker for that: http://bugreports.qt.io/ (choose QPA: WebGL component). Your feedback will help our product management team to shape the feature’s roadmap.

The post Qt Quick WebGL release in Qt 5.12 appeared first on Qt Blog.

Additional Device Creations targets available under Qt Account

$
0
0

We have enabled an improved ability to add new device creation targets to existing Qt releases outside of Qt release schedules. In practice this means, that Qt for Device Creation license holders can find additional embedded target support packages under their Qt Account downloads, additionally to those available under Qt Online Installer and Maintenance tool.

Qt Board Support Package overviewWe have had the ability to upload QBSP (Qt Board Support Package) in to Qt installation through the Maintenance tool for several releases already, but now all the necessary pieces for end to end support are coming together.

QBSP is file format having required toolchains, target hardware firmware, operating system, Qt and Boot to Qt demo application, required configurations for IDE (both Qt Creator and Microsoft Visual Studio) and all other necessary bits and pieces in one package. The QBSP makes adding new target hardware support for embedded developers super easy.

Qt Board Support Package downloads page In future, developers can find additional embedded target support packages, QBSP files for download under their Qt account (account.qt.io). Remember to first select your license (Qt for Device Creation), then product level filter for QBSP downloadables (Qt for Device Creation QBSP) and then the Qt release you are using (Qt 5.12.0 in the above picture).

The big benefit of this model is our ability to open up our delivery channel and QBSP creation for external parties  as well as remove dependency from Qt release schedules and available supported hardware for each release.

The post Additional Device Creations targets available under Qt Account appeared first on Qt Blog.

Viewing all 19 articles
Browse latest View live